Sign in to create or edit a product review. NO SPOILERS Heroes for Highdelve has an interesting background. Produced for the 50th anniversary of GenCon, it’s a combination of introductory Pathfinder adventure (plus incentive to buy the related Cavernous Lair flip-mat), advertisement for GenCon’s four iconic characters (presented in Pathfinder rules for the first time), and mini-product catalog for a miniatures & paint accessories company called Games & Gears (Booth # 2402!). The product is 22 pages long, with maps on the inside front- and back-covers, 12 pages of adventure, 4 pages for the GenCon Iconics (integrated into the adventure with individual story hooks), and 4 pages for the Games & Gears products (which include minis of the Iconics and one of the villains). Although obviously produced with commercial partners, the module is very professionally done, with excellent interior maps, artwork, and solid writing. And, an awesome cover—if they made that into a poster, I’d hang it up! I got to play Heroes for Highdelve via play-by-post for Pathfinder Society, and we used custom PCs (I had no idea the product was even intended for pre-gens). For me, the module is most memorable as the first appearance of my Prophet of Kalistrade character, Nistivo Cirek. For everyone else, the adventure itself is fine but forgettable. It does have value as a one-shot with a 2-3 hour running time (perfect for when the usual PFS 4-5 hour scenario running time won’t work). SPOILERS!:
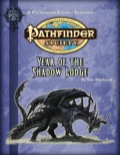
Heroes for Highdelve is set in the eponymous town, which is located at the foot of the Goluskhin Mountains in Brevoy. The PCs arrive during the annual Brightbloom Jubilee, a spring festival, and can have fun with various low-stakes games like sack races, kick-sack (hacky-sack), a puppet show, and more. The adventure assumes the use of the pre-gens, who each have a reason for coming to Highdelve, and expects the PCs to be asking a lot of questions of the locals during this time. Perhaps oddly though, but fortunately for custom PCs, most of the NPCs just give the questions the runaround or say the equivalent of “I’m busy now, but ask me tomorrow”; the actual adventure itself has nothing to do with the PCs’ individual quests. My GM did an excellent job adapting the adventure for PFS, as it wasn’t until I read the module for this review that I realise how much he had to make up in order to get us hooked into the adventure. Anyway, after some relaxed fun at the jubilee, the adventure kicks into gear when a pair of town youth stumble in, bruised and bloodied. The pair were the town’s celebratory “Bloomgivers” this year, given the honour of walking to the nearby Dendra’s Slope to collect special flowers for the jubilee. It turns out, however, that they were attacked by two other youths in town (Richelle and Tolwin) who were angry about not being chosen as Bloomgivers. And worse, the (rather violent) juvenile delinquents even took the golden amulet of Aurelliax (the town’s gold dragon protector, who hangs out in human form) from the Bloomgivers! “Are there any among you who are willing to be heroes for Highdelve?” asks Aurelliax. Nistivo Cirek will—for the right price! Part 2 of the module has the PCs travelling to Dendra’s Slope. After finding the site of the attack, they’ll soon find (hiding nearby) Richelle and Tolwin. What the PCs won’t be expecting is that the two aren’t by themselves--their attack on the Bloomgivers was prompted by an evil tiefling rogue named Feran the Pale. (Feran had some sort of unrealistic plan to distract the townsfolk so he could steal from them, but the motivation here is pretty week). I’ll just note as an aside that Richelle and Tolwin fight with longswords and Feran has sneak attack, so it’s perfectly possible that this seeming “playground bullies”-style adventure could become lethal (combats are first level being notoriously swingy in Pathfinder). Part 3 of the module has the PCs facing off against what could be a pretty big threat: an ettin that is wearing Aurelliax’s amulet (it was part of Feran’s plan). Alas, the ettin doesn’t have much in the way of personality, so this is a pure combat encounter. And that’s it--there is a *very* short (one sentence) conclusion to the adventure. As an introductory experience to Pathfinder, Heroes for Highdelve is certainly serviceable, though I don’t imagine the plot or writing will be especially impressive to newcomers to the game. NO SPOILERS Year of the Shadow Lodge was the first Pathfinder Society multi-table Special event. Compared to later Specials, it seems incredibly streamlined and straightforward, as there's no later innovations like different tables choosing different missions, aid tokens, mustering activities, etc. Honestly, it was kind of refreshing. That being said, although I liked the general idea of the scenario, I don't think the plot holds together very well and many of the combats are repetitive, very easy, and fairly bland. I played it at highest subtier (10-11) with my Kellid Shaman, Gurkagh, via play-by-post last year. I find the play-by-post conventions run Specials at incredible speeds (usually finishing weeks before the convention is set to end), which is unfortunate as everything becomes a bit of a blur. Anyway, today, the Special is certainly playable but probably mostly of interest as an interesting development in the history of both the fictional and the real Pathfinder Society. SPOILERS!:
Prior to the events of Year of the Shadow Lodge, the fictional Pathfinder Society is largely unaware that there is a secret network of members dissatisfied with the group's slow pace and bureaucratic nature. Apparently, there are dozens and dozens of members working to change the organisation within and plotting an eventual overthrow of its leadership, the masked Decemvirate. However, the members of the Shadow Lodge are, by nature, cautious and secretive, and thus want to carefully lay in wait while developing the strength to make the revelation of their existence simultaneous with successfully seizing control. Unfortunately, for the Shadow Lodge, one of its members, a sorcerer named Charvion, is tired of waiting--he wants to act now! Charvion has planned a major (and by major, I mean several dragons and a horde of goblins) assault on the Grand Lodge. But there's intrigue within intrigue, because the rest of the Shadow Lodge thinks Charvion is foolish. So, they feed him red herrings that the Decemvirate's secrets are on scrolls buried beneath the Mortuary at the Grand Lodge. They hope that, in the likely event Charvion's very public attack fails miserably, the Pathfinder Society either continues to disbelieve in or greatly underestimates the Shadow Lodge's real strength. Charvion's plan is a bit convoluted, and I don't really understand it. The general premise is that he plans to use a minor Azlanti artifact recently discovered in the Mwangi Expanse called the Cage of Spirit Echoes. The Cage allows the user to communicate with the dead. As hundreds of Pathfinders will be present at the unveiling of the Cage during a major Absalom holiday event (the Passion of the First Siege of Absalom), Charvion plans to have his dragons attack as a distraction while he then takes the Cage and rushes over to the Grand Lodge and fights his way into the Pathfinder Society Mortuary to dig up the Decemvirate secrets. I'm honestly fuzzy why he needs the Cage to dig up the scrolls, how he has managed to secretly amass an army of dragons and goblins and sneak them into Absalom, and why, as a sorcerer and a Pathfinder in good standing, he couldn't just walk right into the Mortuary in the middle of the night, bump off anyone there, and do his digging without all the drama! In other words, the plot just doesn't really hold up, and nor do I understand why the rest of the Shadow Lodge would let it go forward--after all, anyone who can amass an army of dragons and goblins and wield an artifact is going to seem like a major threat, so surely the Pathfinder Society will take the Shadow Lodge seriously in the future. And, that is exactly what happens at the end of the scenario: the existence of the Shadow Lodge is confirmed. It really makes the Shadow Lodge look kinda dumb, which undermines the dark conspiracy storyline the PFS organisers wanted to tell. Anyway, the Special moves quickly. Act 1 starts at a massive stadium in Absalom called the Irorium, where the festival is to take place. I love that only PCs of the highest subtier gets the "good" seats (next to the field); more scenarios should give perks to those who have earned it! For some reason, the scenario spends several paragraphs describing the physical features of the Irorium, even though none of it matters because the combat will take place on a flip-mat that is only a pale, symbolic version of it. When Charvion makes his move and seizes the Cage, the dragons and goblins attack and the PCs need to fight them off in order to escape. Act 2 has the PCs hearing of an assault on the Grand Lodge, but needing to fight their way through an ambush in the Foreign Quarter before they can get there. The ambush is more goblins, obstacles (that mechanically function as traps--a bit odd), and a Shadow Lodge cleric of Groetus named Melyra. If the PCs actually capture Melyra alive and interrogate her, they can get the broad outlines of what is happening; otherwise, they'll probably be completely in the dark. Act 3 has the PCs needing to fight their way into the Grand Lodge by breaching its falls and overcoming yet more goblin defenders. Act 4 is interesting, as an old black dragon named Zythrustianax is perched on the roof of the Mortuary. PCs of the highest subtier can actually fight it if they want, while PCs of every other subtier need to try to sneak in, with failed Stealth checks resulting in the dragon's tail slaps dislodging rubble to drop on them! There's a nice cooperative element here, as tables can work together to distract Zythrustianax so others can get inside (and, similarly, the first table that manages to break the door down makes things easier for every subsequent table to get in). There's a nice custom map of the Mortuary to handle multiple encounters inside (more goblins, beetle swarms, spectral undead somehow unleashed by the Cage), and finally Charvion himself. Unless the PCs were completely devastated by the earlier encounters, they'll probably have no trouble defeating a lone sorcerer (unless, at high subtier, he manages to get off a death spell or two). When Charvion is defeated, his body and soul are sucked into the Cage of Soul Echoes in a gleeful bit of flavour text. And now we know: the Shadow Lodge is real! NO SPOILERS I got to play Fury of the Final Blade with my half-orc Paladin, Trokkus. The scenario takes place in a country I find really interesting but have hardly ever adventured in: Galt. Galt is Golarion’s analogue to the French Revolution, but as the title of the scenario implies, the guillotines here take not just your head, but your soul! Although my PC wasn’t particularly well-suited to the scenario, I think it’s well-written and well-designed. It’s open-ended and allows for some player creativity, develops an NPC arc that had been in progress for years, and is fairly original in terms of plot and gameplay. These later season PF1 scenarios tend to be steeped in lore, rich in plot, and carefully written. Fury of the Final Blade is no exception. It’s definitely worth playing, and perhaps a must-do for members of the Liberty’s Edge. SPOILERS!:
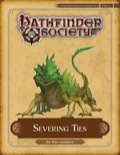
Major Colson Maldris, long-time leader of Liberty’s Edge, may have gotten (literally) in over his head. Tying in heavily to # 9-02, we learn in Fury of the Final Blade that Maldris’s plan for the recalcitrant and corrupt nobles of Andoran to face justice in Galt has gone dramatically awry. Not only are the nobles going to be executed without trial, but Maldris himself faces the chopping block! Venture-Captain Eliza Petulengro (amazing artwork, but with a personality that doesn’t match) sends the PCs in to Isarn to rescue the Andoren nobles and, if possible, Maldris. The stakes are high, because if the PCs fail, the Pathfinder Society, Galt, and Andoran could become locked in conflict, and the Red Revolution could spread. Pretty cool set-up for an adventure! The PCs arrive in Isarn the night before the executions are scheduled, so they don’t have time to rest and need to get into planning the prison break immediately. There’s lots of options available in terms of preparation, such as trying to time guard patrols, steal uniforms, etc., and this part is fairly open-ended. The scenario is actually a bit confusing on the time element, because in one place it says the group has time to conduct two investigations to prep for the prison break, but elsewhere it gives the specific number of hours different tasks take (without telling the GM how many hours are available). I like how the prison has sensible precautions in a fantasy world; for example, you can’t just teleport in or easily scry to discern the facility’s layout. The scenario features a cool villain--a Gray Gardener mesmerist named Citizen Dread--along with some tough foes like sakhils and (potentially instantly deadly) banshees. More, the PCs are likely to rouse the ire of mobs of Galtans, bringing the troop rules into play. The whole sequence of events can play out differently depending on the PCs’ actions (something every scenario should envision), down to the question of whether the PCs think Maldris is worth rescuing at all since he’s been disloyal to both the Society and to Andoran. In short, Fury of the Final Blade presents lots for the players to work with. There’s plenty of room for role-playing, combat, strategy, and moral debate, all in the context of a solid story and development of a major NPC and faction. Putting all of that together in one scenario isn’t easy to do! NO SPOILERS I played Severing Ties via play-by-post way back in 2018 and apparently completely forgot to write a review for it! I might never have noticed, but for the fact that I'm running the Second Darkness adventure path, which starts in the city of Riddleport, and I try to do a thorough read of related Pathfinder setting materials before running a game. Severing Ties is also set in Riddleport, and helped flesh out some key locations in the city for me. I also ended up stealing bits and pieces of the scenario's plot as an optional side-quest (but ended up disguising that fact too well, leading the PCs to spend a lot of time on it!) Such are the perils of GMing. Anyway, as for the scenario proper, I think it's done reasonably well but I imagine many groups struggle with an expectation that they'll avoid direct combat in a particular area, which could mean PC death or even a TPK. Most Pathfinder PCs just aren't very subtle, and this is a scenario that expects subtlety. SPOILERS!:
The backstory to Severing Ties involves the Aspis Consortium trying to improve its relationship with the Cult of Lissala after some drama involving the Hao Jin Tapestry in previous scenarios. What the Consortium, led in Riddleport by a silver agent named Vidrin Jenk, wants to do is gift the cultists with three items sacred to other faiths in the city (presumably, so it can sacrifice or desecrate them in some way). As each of these faiths owe the Aspis Consortium a financial debt, it should be a simple matter of having someone pick up the sacred items as payment and deliver them to the cult's secret safehouse. But what those Aspis snakes don't know is that the Pathfinder Society is on to their plan, and intends to throw a wrench in the works! Venture-Captain Sheila Heidmarch explains to the PCs (in a quick flashback briefing in Magnimar) that she's arranged for a group of Aspis specialists to be intercepted en route to Riddleport so that the PCs can impersonate them. Once they've collected the three gifts and learn the location of the hidden cult safehouse, they're to sabotage it to discredit the Consortium in Lissalan eyes and break the alliance. It's a creative premise for a scenario. Despite the premise, those rare PCs who invest a lot of ranks or abilities in skills like Disguise and Bluff will probably be disappointed to learn that the scenario handwaves any checks. Vidrin Jenk and the other Aspis thugs at their headquarters in Riddleport (Barracuda Cartage) automatically believe the PCs are out-of-town agents once they see the brass coins that Heidmarch has provided. The Consortium really needs to invest in photo ID membership cards! The PCs can visit each of the three temples to collect the gifts in any order. One is Publican House, the city's temple to Cayden Cailean, which is of course a raucous tavern. The sacred mug the PCs need to obtain has been inadvertently entered as a prize into a drinking challenge, and this presents a fun opportunity for a light-hearted contest of strength, dexterity, and intestinal fortitude. Another temple is the House of the Silken Veil, a brothel dedicated to Calistria. Here, the PCs need to negotiate with the temple high priestess/madame, Shorafa Pamodae. It's very possible they get tricked into accepting a fake sacred relic (a dagger in a locked case that has magic aura cast on it), but the way the scenario plays out, getting fooled probably won't matter in the end. A third temple is the Fish Bowl, the city's temple to Besmara; here, to obtain a sacred bicorne hat, the PCs will have to fight some sea creatures feasting on some human sacrifices! For Riddleport aficionados, the scenario doesn't do much to give the city a distinct feel (as a pirate haven/gang town), but it's still nice to have these temples and NPCs fleshed out. Assuming the PCs can get at least two out of the three sacred objects, Jenk then provides them with the location of the Lissalan safehouse to deliver the gifts; the safehouse is hidden under an abandoned tattoo parlor. Here's where it's vitally important that the PCs remember their mission: sabotage the safehouse, don't get into traditional dungeon crawl and try to fight their way through! The threats in the underground complex are very real: basilisks that can easily turn someone to stone, a couple of dozen cultists, an animated stone guardian statue, etc. PCs can succeed in the sabotage by doing things like setting the basilisks free, causing a gas leak, flooding it, and more, but the scenario instructs GMs to allow creative options the PCs come up with. Once the sabotage has been performed and a clue left to implicate the Aspis Consortium, the PCs can escape and consider it a job well done. The overall lesson of this part of the scenario is: fights probably mean failure, so be smart! All in all, I like the general story and approach taken in Severing Ties; it's certainly different than a run of the mill scenario. It also helps flesh out a key location in Varisia. I'd recommend it, but probably only for more experienced players who will pay close attention to the exact instructions given to them in the briefing. NO SPOILERS The Asmodeus Mirage is one of the notorious "retired" Pathfinder Society scenarios from Season Zero. I played it "just for fun" with my summoner, Jakeric, and it's pretty easy to see why it was retired: the chance of a TPK (and need for a body recovery) is pretty bloody high! The underlying premise is kinda neat, but the actual execution of the story is a let-down and there's not necessarily a lot the PCs can do to control their fate. An enterprising GM might be able to steal an interesting idea or two for a homebrew game, but overall, there's not a lot to recommend the scenario. SPOILERS!:
The backstory to The Asmodeus Mirage is cool: when the gods battled Rovagug across the face of Golarion eons ago, the crystalline bone devil that served as the Herald of Asmodeus was struck down in what became Katapesh. Ever since, for 24 hours every century, a pocket dimension opens up with the crystal skeleton at its center. Anyone who ventures in and doesn't leave before those 24 hours are up risks being trapped there until it opens again 100 years later! And, of course, the Pathfinder Society has managed to pinpoint the location and opening schedule of the so-called "Asmodeus Mirage" and wants to send a team in to investigate, with the goal of returning with the crystal skeleton before it disappears for another century. Why exactly the PFs might select a group of Level 1-2 PCs for this mission is beyond me; maybe there was a mix-up in the cabinet containing lists of field agents? After a briefing by Venture-Captain Rafmeln (only ever seen in this scenario; perhaps he was "retired" for sending agents on this mission?) in the Katapeshi Pathfinder Lodge, the PCs have a chance to buy gear before an off-screen journey to the Asmodeus Mirage. Once inside the pocket dimension, the 24-hour countdown clock starts. The scenario is structured as a set of four encounters in the mirage that the GM selects randomly, with the journey between each encounter taking a random number of hours (that can be reduced with a good Survival check). The pocket dimension is morphic in the sense that there's no reliable directions or fixed geographic points, meaning that depending on dice rolls, PCs might stumble into the same encounter multiple times (despite trying not to). PCs also need to attempt Fortitude saves against the heat (it is the desert, after all), which makes perfect sense but can be quite draining for low-level characters (especially with any time spent resting counting against the 24-hour limit). The encounters range from fairly pedestrian combat (like groups of illusory skeletons) to some with role-playing potential (like a peaceful gnoll village menaced by ankhegs) to intriguing mixed-bags (like an insane CR 19 brass dragon who wants the PCs to clear his lair of pesky vermin) to the main event (the crystalline skeleton, which will be guarded by different foes depending on subtier). I imagine that at higher subtier (6-7), the encounters and environment would be far more manageable than the more swingy low subtier ones. In any event, the main risk facing the PCs is becoming trapped in the pocket dimension and officially ruled dead. The PCs can choose at any time before that to try to return "home", and so from the scenario's sidebar point of view, the chance of groups getting trapped should be low. However, the scenario only gives the PCs a 25% chance of making it home with each attempt, and as each attempt takes 1d4 hours, a group that waits too close to the end of the 24 hours and has some bad dice luck could easily end up being trapped and effectively TPK'd (unless they have pieces of the crystalline skeleton, which shunts them out of the demiplane automatically when it closes). There is a part of me that loves high stakes scenarios where genuinely bad things can happen to PCs--a game with no risk isn't nearly as much fun, after all. But for The Asmodeus Mirage in particular, I think the stakes need to be better fitted to the level of the characters involved and with a little bit more transparency on just how heavy the odds are against them. Not to mention, there's not really a lot of discoveries or mysteries to resolve once inside the mirage--it's just "get the skeleton and get out" with little opportunity for the PCs to understand the backstory. I imagine more than one group ended up trapped in the mirage, and this probably fueled the push to retire the scenario. I can't really argue against the decision. Fortunately, with the demiplane having just appeared, no one needs to worry about it for another 100 years! I have to append a coda to remark on a Chronicle boon from the scenario that is a classic, and hilarious, example of stingy rewards (or what we would, today, call trolling): PCs, after having somehow survived the risk of being trapped in another plane of existence for a century, receive a whole +1 to Diplomacy or Intimidate checks vs "western Katapesh gnolls"! Talk about earning bonuses the hard way! Sometimes I have map packs sit on my shelves for *years* before the right time comes along to pull them out. Such was the case for Elven City, as my players visited the elven village of Crying Leaf in my Second Darkness campaign. A visual representation of the village wasn't strictly necessary, but I thought these cards gave a good feel for what elven architecture is like: curved, flowing, in-tune with nature, and with few right angles or harsh lines. The map pack includes several elven homes, an excellent meeting hall, a water feature/garden, and even what could stand in well for an elf gate. The artwork is crisp and colorful. To be frank, most campaigns won't call upon this map pack very often--but it's still a nice addition to a GM's library. NO SPOILERS I’m of two minds about Echoes of Woe, the fifth in the series of Starfinder “Bounties” (short adventures meant to be played in 60-90 minutes). The premise is solid and at points it has a good feel, but I also think it’s overlong and a bit too “video-gamey” to really make the best use of that feel. I ran it via play-by-post for Starfinder Society, but I think it would probably be best as a home game one-shot where the GM can customise it more and not feel rushed to finish in a certain time frame. I think the cover is good, but the interior artwork doesn’t quite fit the bill. SPOILERS!:
Echoes of Woe is set in the growing town of Ysantro in the Qabarat region of Castrovel. Because the city is expanding, a company named TeleWright wants to redevelop an old, abandoned hospital—but it can’t do that until the site receives a final inspection, and no one’s willing to go in it because of rumors that it’s haunted! Thus, the PCs get hired for the job. It’s a classic set-up (everyone loves creepy hospitals, asylums, and orphanages). The backstory to the Bounty is good too. Back when the hospital was in operation, the hospital’s head doctor, Sikooli, tried to cure her son, Ajanu, of a degenerative disease caused by exposure to sunlight. Sikooli hit on the idea of combining particles from the Shadow Plane with nanites, but the resulting “venumbrites” drained the life of everyone inside the hospital, including Sikooli! Today, Sikooli roams the hospital as a grieving ghost, while her son, Ajanu, is an undead borai who still lives in the hospital to care for her. One of the issues in terms of duration is that the Hospital flip-mat has a *lot* of rooms (14), and players of this type of RPG are trained to cautiously explore each one. Add in a bit of good role-playing and some combat, and 60-90 minutes isn’t realistic for most groups. The atmosphere set up by the scenario is pretty good, and I especially liked a sidebar’s tips on how the GM can make it darker or lighten it up depending the group’s comfort level with horror. Still, some of the hard-coded elements (like scouring the hospital for multiple pieces of a ritual to set things right, dealing with four different squoxes) seemed a bit repetitive and detracted from the feel. And one of my common mechanical complaint—asking for skill checks to accomplish something but providing no penalties if they fail (so you just have endless retrying until success) definitely rears its ugly head here. So my advice (noting that Halloween is just a few weeks away as I write this) is to draw upon the broad outlines of the scenario, dispense with all the squoxes but one (and make it a shadowy, venumbrite-affected one), and do the whole thing theatre-of-the-mind without even showing a flip-mat. The game will be faster, spookier, and more fun. NO SPOILERS Beyond the Pool of Stars is a fantastic trade paperback in the Pathfinder Tales line. Set in Sargava (a jungle, coastal region in the Mwangi Expanse that has thrown off Chelish control), the novel follows the exploits of Mirian Raas, part-Pathfinder/part deep sea salvager. I thought Howard Andrew Jones' previous novels in the Pathfinder Tales line were fine, but this one really impressed me. It's full of heart, surprises, action, and makes great use of an interesting setting. I definitely recommend it. SPOILERS!:
After her father dies in the course of running the family salvaging business, Pathfinder Mirian Raas returns to Sargava to (reluctantly) lend a hand. She and her small crew of salvagers get involved with a trio of lizardfolk who wish to recover the contents of an ancestral vault deep in an area of the jungle now overrun by boggards. A representative of the Sargavan government (and her son) join the expedition, as the salvaging business is deeply in debt to the government and it's counting on Raas finding a real score of gems to help pay the protection money it owes the pirates of the Shackles to help defend it from Cheliax. However, Mirian's brother is in love with a secret Chelish agent who'll stop at nothing to sabotage the whole endeavour. That's the barest brushstrokes of the plot, but Jones adds layers of flavour and detail to flesh everything out. The action scenes are genuinely suspenseful, as no one is immune to danger from "plot armor". Devotees of underwater combat will be impressed by the fidelity to Pathfinder rules and incorporation of magical gear, while readers interested in Sargava will find its portrayal rich in detail (the depictions of race and class issues in a post-colonial setting are skillful). I've actually become a fan of lizardfolk because of the novel thanks to their description in the book. I genuinely can't think of any criticisms (unusual for me!), so do yourself a favour and buy this book. NO SPOILERS If, like me, you're not fortunate to have a regular group methodically playing through PFS or SFS scenarios in orders, there are occasional downsides to just signing up for what's available online. For me, I didn't realise that Hope for the Future was the big capstone scenario to the Season 4 ("Year of the Data Scourge") metaplot. Playing it not only spoiled me on some of the twists in the season's storyline, but it also fell fairly flat because I wasn't really aware/invested in what was happening. The scenario itself is (almost) one long "boss battle" that might have been satisfying if I had played steadily through the season. But them's the breaks! As a scenario, it has more of the feel of a Special--high stakes, lots of combat, and limited role-playing. Not my favourite style of game, but your tastes may vary. Oh, but awesome cover! The art design team has really picked things up in Season Four. SPOILERS!:
Hope for the Future takes place on (and technically around) Absalom Station. Apparently, the Starfinder Society has learned that the mysterious Data Scourge virus was engineered by the revived Historia-Prime. The Stewards have dispatched a fleet to the coordinates where the virus' "source location" is and expect to finally confront Historia-Prime in the process. The PCs, and hundreds of other Starfinders, gather together in the Forum in the Lorespire Complex to learn (and grumble about) not getting to be part of the action. There's a good opportunity for some role-playing before the drama actually starts, and I liked the premise of Royo and some of the Society's other tech-adverse NPCs starting a movement to limit the organisation's reliance on technology. First Seeker Ehu Hadif has just started addressing the assembled crowd when suddenly Absalom Station comes under attack by a massive, ever-shifting, silvery fluid vessel! The Armada tries to defend the station but isn't having much luck. Ixthia the Unbreakable gathers together the PCs and rushes to their shuttle to be part of the action. Curiously though, by the time the shuttle gets into space, the silvery vessel has transformed into a massive space-platform--a near-perfect copy of the Lorespire Complex floating in orbit around Absalom Station! Apparently, Historia-Prime has pulled a sneaky trick and, instead of waiting around for the Stewards to arrive, has launched a sneak attack to take over Absalom Station. As a player, I found all of this fairly confusing, but I can appreciate it as a cool image if the GM is able to really sell it. From this point, we have a classic "space-dungeon crawl" as the shuttle lands on the surface of the complex and the PCs disembark to investigate. (Ixthia the Unreliable conveniently stays behind to "harry the defences from the outside"). The PCs encounter artificial nanite-composed simulacra of Celita and jinsuls before encountering someone "real"--an android named Hope-01 (from SFS # 4-13). The group better rescue him, because he says he can delete Historia-Prime's digital back-up copies so the PCs can defeat him once and for all. Along the way there are "nanite mounds" which function both as traps and as a resource that PCs can manipulate for advantages (I don't think our group did much with them) Most of the scenario is taken up by a three-phase combat versus different forms of Historia-Prime in a (admittedly cool) chamber called the Prime Core. History-Prime does lots of classic villain monologuing during the battle, which helps to fill in some of the backstory, but in essence this is a long boss battle. Once it's over, and assuming the PCs win, they face an interesting moral choice. Hope-01 explains he still retains part of the memory and personality of Historia-Prime and could someday evolve into a threat, and should therefore be destroyed himself. The scenario supports either course of action (though subtly rewards the "let him live" choice by providing additional Reputation). There's also a whole thing about the artifact that apparently let Historia-Prime continue to clone his consciousness, but the scenario takes the lazy opt-out of providing no detail about it and saying it'll be locked in an SFS vault. Anyway, that's the end of the Year of the Data Scourge! I wasn't particularly impressed by the finale, but, as I said, part of that may be me coming in without much background. Great Setting and Solid AdventureNO SPOILERS The Liberation of Locus-1 is a 64-page entry in Starfinder’s adventure module series. Designed to take characters from level 4 to 7, it can be run as a standalone adventure, a natural follow-up to Junker’s Delight, or as a replacement volume for an adventure path. I played it with my fun characters Nixxer and Professor Kipe and thought it was a solid adventure even if those PCs didn’t quite fit what the story expected. As the title indicates, the adventure centers around Locus-1, which is a scientific space station orbiting a mysterious “metastar” in a recently-discovered star system. First up, let’s talk about art. The cover is solid, and it’s nice to see the Sunset Maiden again, but it would have been even better to have Locus-1 depicted as part of the action. That’s because, inside the book, there’s not really a good exterior shot of what the space station looks like! I find this a common problem with Paizo books--minor NPCs get artwork, but key settings which are hard to describe in words are left to the imagination. As for the interior art, it’s okay, though a bit cartoony and undetailed for my tastes compared to the hyper-realistic art in the Core Rulebook. The interior maps are well-designed, but they are *large* in scale and a GM will need to prepare accordingly (more a concern for an actual tabletop game than for a virtual tabletop one). It would be nice to have a visual representation of the Locus System to go along with the written description in the gazetteer. Speaking of the gazetteer of Locus-1 and the Locus System, that’s the first piece of back matter. In eight pages, we get a well-written history and overview of the star system and the space station built to investigate the mysterious metastar at its center. There’s some particular good bits I like, such as a small Starfinder Society lodge and a bar called the Hard Stop that tries to present itself as a classic “seedy cantina/dive bar” but can’t pull it off because Locus-1 is just too civilised! The setting has all the elements that would make it a great “home base” for the PCs: it has basic infrastructure, good NPCs, isn’t overwhelming by having information spread across a dozen books, and it supports some interesting adventure hooks. In other words, it’s easy to envision a campaign set entirely in the Locus System. The second piece of back matter is the “Adventure Toolbox” (6 pages). This starts with a page of weaponry that utilise special Locus crystals that give a weapon a special property: Healing. In short, blast someone with one of these, and they heal hit points instead of taking damage! They’re limited use, of course, but still pretty neat in concept. The section then moves on to an Alien Archive, with three new creatures. There are two playable races whose homeworlds are in Azlanti space: gathols (hulking but frankly forgettable mountain-dwelling humanoids) and tromlins (dinosaur-humanoids that will surely meet a burning desire in some player’s hearts). The third new creature is mindshroud rays, which can attach themselves and take over a humanoid’s body--they’re probably more a story aid then a direct threat. Onto the adventure! SPOILERS!:
The adventure hooks for The Liberation of Locus-1 are a bit sketchy. There are a few short ideas on reasons the PCs might have come to the station, but this is an area each GM will have to expand on their own because it doesn’t really matter from the adventure’s perspective. Instead, this is one of those adventures where the PCs are in the wrong place at the wrong time and simply get drawn into a course of dramatic and dangerous events. Part 1 (“Four Alarms”) starts with a bang, as the PCs are in a marketplace on Locus-1 when suddenly a dinosaur crashes through the area, goaded on by a pirate! An exterior window gets shattered in the fracas, causing a hull breach and exposure to vacuum that threatens to suck nearby civilians outside! The module divides the situation into four separate “Events” and explains how the order they’re ran can be rearranged depending on the PCs’ response. This is smart because it keeps the action from becoming overly scripted and rail-roady. The encounters are very detailed in terms of terrain, hazards, enemy tactics, and other special considerations, which helps give each one a special feel. In other words, the writing was done carefully instead of lazily. Various NPCs intervene in the encounters, which is important to establish Locus-1 as a “real” place instead of a cardboard background for the PCs to run rampant. The overall goal of Part 1 is to introduce the PCs to Locus-1, some of its key NPCs (including its ruling Science Council), and to give the impression that life on board may be far from sedate. Part 2 (“Chaos System”) consists of four mini-adventures that can be presented in any order (though there is a natural progression to them, it’s again good that the GM can be flexible depending on what the PCs do). Before the adventures are described, several pages in this Part are devoted to helping the GM continue to introduce the setting, major plot points, and how key NPCs adjust their attitudes depending on the PCs’ interactions with them. It’s an intelligent way of integrating a lot of material. As for the missions, the first one is “Research Recovery” and has the PCs leave Locus-1 to travel to the planet Tyru, where magic is unstable and the weather is awful, to recover some data from a research station that was recently destroyed. The second one is “Mining Camp 001”, and this is where the PCs may first learn that the Azlanti Star Empire is interested in the Locus System as well. The action takes place on the planet Godrum, where the Azlanti are using android slaves to mine crystals. There’s a lot of great detail to reward careful planning on the players’ part. Alas, I think my group accidentally/on purpose blew this planet up! The third mission is “Pirate Problems” and sees the PCs confront the pirate group responsible for the drama in Part 1. They’ll have to repulse an ambush on the station (I like how civilians can accidentally be hit) and engage in a starship battle against the pirates’ flagship. This leads naturally into the fourth mission (“Besmara’s Head”) which sees the PCs storming the pirates’ base in the Locus System, a floating asteroid in the shape of a skull! This is the longest mission, as the base has several surface chambers and catacombs to explore and multiple encounters. In effect, it’s a big “space dungeon”, but one that’s done well and is interesting. Part 3 (“Battle for Locus-1”) is something I can review only as it comes across on the page, because my group didn’t play through most of it. The premise is that Locus-1 has become the target of the Glaive of Remulis, an Azlanti destroyer, and ordered to surrender. Most members of the ruling Science Council are ready to capitulate, but one member thinks the attack can be repulsed if the station’s Locus array (some high magic/tech) can be activated. It all looks very exciting, with the PCs expected to hold back waves of Azlanti troopers as they simultaneously work furiously to get the Locus array activated and then engage in battle with the Azlanti destroyer. It also looks like a big GMing task, as there’s a *lot* to handle. The reason my group ducked out of it was that we were playing mercenary types and this part of the adventure was designed for straight-out heroes. Most adventures hedge their bets by offering some sort of reward, but this one didn’t, so our group thought fleeing for their cowardly lives was the most profitable outcome! I know this disappointed the GM, but it really wasn’t his fault--we were having a blast but wanted to stay true to our characters’ motivations. Anyway, that’s The Liberation of Locus-1. I definitely recommend it for some of the best Starfinder adventure design the game has to offer. So there I was, minutes until the session started. I had a tenebrous worm ready to attack the PCs in some tunnels deep under a d'ziriak hive, and all the flip-mats and map-packs I looked at had traditional constructed dungeon corridors instead of the natural tunnels I needed. And then I spotted Cave Tunnels unopened on my shelf, and knew it would be perfect! There's nothing fancy about it, but it does exactly what you need it to do: natural rocky tunnels in dim light with plenty of branches. Certainly something one could use for all sorts of quick random encounters underground. The players might not have been happy about the resulting slaughter, but for a harried GM, it was gold! I pulled out Lairs recently when a random encounter with a harpy showed up and I needed a good place for it to be feasting on some travelers. In four groups of four (and one group of two), the tiles form the following lairs: a cool mini-dungeon with an arcane theme and visible victims of previous traps; a nice-looking farmhouse (maybe for a surprise encounter?), a small cave extending a few dozen feet into a hillside (perfect for my harpy), a forest/jungle clearing with some huts (good for a tribal monster encounter), and a really evocative ancient stone temple(?) with steps, a pool at the center, and loads of bodies. There's plenty to work with here, and I guess the key is to keep the tiles organised by group so you know what you have available and can quickly pull them out when the time is right. They're all nicely detailed. I can definitely see using them again in the future. NO SPOILERS I’ve run a lot of 3.5-era Pathfinder modules in my long-running “Roots of Golarion” campaign. Sometimes it’s a challenge to integrate them, like forcing a jigsaw puzzle piece into the wrong place with the help of some scissors and tape. The Demon Within, however, slotted perfectly thanks to a happy coincidence with one of the campaign’s PCs. We ended up having a great time, with the events in the module creating a potential retirement opportunity when the campaign is all over. Not every module will work the same for every group, but all I can say is that it worked for ours. Some general points: the adventure is written for level 11 PCs, but it’s still pretty tough with a lot of encounters in a short space of time (depending on how the PCs proceed). The writing and detail are fantastically gruesome, which fits the circumstances of the adventure perfectly but could offend some squeamish sensibilities. In terms of art, I love the front cover (its thematically appropriate), but the interior art is mostly mediocre. Maps are very good, though very large (in terms of 5’ scale) and may be a challenge to represent on the gaming table. One of my favourite things about these early Paizo modules is the “Designer Sidebars” throughout, in which the writer discusses potential snags and provides tips for the GM to overcome them. The adventure itself takes up 26 pages, with the remaining six pages devoted to appendices that I’ll discuss in the next section because they might be a bit spoilery. SPOILERS!:
The Demon Within is set in two locations in the city of Kenabres in Mendev, a country adjacent to the demon-infested Worldwound. Because countless teleporting demons are impossible to fight and contain through normal means, salvation for Mendev came in the form of the wardstones: a linked chain of artifacts along the border between Mendev and the Worldwound that prevents demons from teleporting across. I’m not sure whether the concept of the wardstones first appears in The Demon Within, but they certainly receive their earliest full development here. The module goes into great backstory detail about the heroic warriors of Iomedae, led by Saint Clydwell, who discovered the wardstones and how they could be linked and empowered by a powerful artifact from the Worldwound called The Demonscope. However, keeping The Demonscope (and thus wardstones) operational requires constant vigilance by a trio of the most faithful and selfless of Iomedae’s knights: the Order of Holy Sentinels. Even if a GM doesn’t run the adventure, the module is great for the amount of lore and depth it adds to Mendev and the Church of Iomedae, and could probably (I’m guessing) be fitted into a side adventure for Wrath of the Righteous. The adventure’s premise is that a danger has arisen that no one in Mendev realises: one of the Holy Sentinels has been corrupted! Plagued by doubt and constant fears of failure, Sir Holton Albright, the newest Holy Sentinel, has been tricked by a demon into removing one of the sacred relics that keeps The Demonscope operational. And at the public ceremony where he’ll be formally consecrated to the order, all hell (or, should I say, the Abyss) breaks loose! This is where the adventure starts for the PCs, as they’re guests during the consecration ceremony when a massive glabrezu, disguised as Albright, transforms into its true form and begins wreaking havoc, while mobs of dretches appear to attack the various emissaries and guests, and a pair of vrocks crash through the temple’s stained-glass windows. It should be a scene of utter chaos (fitting for demons) as the PCs try to figure out where to go and what to do first when pulled in so many directions. In other words, an exciting start to the adventure! (Getting the PCs to the consecration ceremony could be hard part; for my group, it was a snap, as one of the PCs is an inquisitor of Iomedae.) Following the battle, word spreads that Clydwell Keep, home of The Demonscope, has fallen! Kanebres’s official demonologist, Kutholiam Vuere, notices how (presumably) well the PCs fought and says there’s a secret tunnel from the temple into the lower levels of Clydwell Keep, and that perhaps it’s not too late. Vuere only appears in the adventure in this section to give exposition--he has a lot of it and it’s important, but the PCs may understandably feel pressure to take action instead of talking and miss much of it. In any event, I imagine Vuere could be a very useful NPC for other adventures set in Mendev. There’s a cool scene in the escape tunnel when the PCs reach the door that leads into the keep’s mausoleum. A few paladins--wounded, fatigued, and almost overwhelmed--hold the door from the PCs’ side. Something powerful and massive must be on the other side and is slamming into the door--BOOM BOOM BOOM! The PCs have three rounds to prepare before the door crashes in and a massive balban demon appears with a swarm of dretches underfoot. The mausoleum itself is notable for three things: 1) Statues, with plaques, naming the various holy warriors interred within—PCs who pay attention will gain a vital clue for the adventure’s endgame; 2) A statue that provides unlimited magical healing to any good-aligned creature that touches it--making it a crucial place to rest and recover between forays into the keep; and 3) An invisible quasit spy named Frqazzikal who secretly follows the PCs, warning the demons in every chamber of their approach and generally harassing them at the worst possible moment. Devious! The PCs emerge from the mausoleum into a chapel on the surface level of the keep. As an example of the grisly writing I mentioned in the opening, there’s a demon-possessed paladin to fight, and he’s nailed his own squire (who’s still alive!) to his tower shield! Jeepers. A GM who wants a fast-paced adventure with elements of horror has come to the right place with this module. The grounds of Clydwell Keep are divided into an Upper and Lower Bailey. Here, different groups will make very different decisions. Some will take it upon themselves to clear out every single building and tower, and there are enough demons to provide a dozen or more encounters (and a ton of XP). Other groups will keep their eye on the prize (restoring The Demonscope to empower the wardstones before its too late) and bypass most of the optional encounters. My group (I think smartly) chose the second option. To reach The Demonscope, the PCs need to breach the keep proper and descend into the dungeons beneath it. Here they have to overcome paladins turned into zombies, babaus, dretches, a demon-possessed Holy Sentinel, a new type of monster called chatterer swarms (a great and memorable monster that should be used again), a black pudding, succubi, a demon knight, a lesser nabasu, and more! Saving civilisation from demon hordes isn’t easy, but a group with a paladin, lawful good cleric, or (as in my group) an inquisitor able to make their weapons into demon-bane ones will get plenty of time in the spotlight. The module does a really good job with Sir Holton Albright--he’s actually a sympathetic figure as he’s now filled with remorse and disgust at himself for being manipulated by the demon. Once found, he’ll help the group understand the problem with The Demonscope and how it can be fixed. This involves locating and placing sacred relics in the correct location, which is where the clues from the mausoleum come into play. Or, the PCs can try to brute force the solution, which can work, but the longer it takes them to figure it out, the more a CR15 balor demon emerges! The balor has limited powers at this point, but it still filled me with joy to have its massive arm appear and take some swipes at the PCs in a very climactic ending. Fortunately, my PCs reactivated The Demonscope and saved Mendev from becoming just another demon-infested wasteland like the Worldwound. You’re welcome! For back matter, the module contains three appendices. The first is a few paragraphs on Kenabres, which really isn’t enough. Although the module doesn’t give the PCs a chance to spend time in the city, a GM should see if they can find more on it elsewhere in case they want to do some stuff there before or after the adventure. The second appendix contains two new monsters: the aforementioned chatterer swarms and sons of perdition; both good additions to the game. Appendix 3 contains stats for The Demonscope and some other magic items, our favourites of which were faith orbs (holy hand grenades!) and water scorpions (squirt guns with endless supply of holy water!). I suppose if one wanted to quibble, there’s not a lot of opportunity for role-playing or skill challenges in The Demon Within and, from one point of view, it’s pretty much a hack-fest. But it’s a really good hack-fest, with a great backstory and excellent use of the setting. I’d recommend it. NO SPOILERS I got to play Grotto of the Deluged God via play-by-post with my Prophet of Kalistrade character, Nistivo Cirek. The scenario takes place in the Shackles, a pirate-infested chain of islands near the infamous Eye of Abendego hurricane. The scenario has a nice connection to a Season 7 adventure (# 7-19: The Labyrinth of Hungry Ghosts). As a whole, I found it about average. Artwork and maps are good. The individual encounters are fine (if a little cliched at times) and I like that there are some non-violent ways to bypass some of them. The plot can seem a little random in sort of “and then this happens, and then this happens” way. In sum, Grotto of the Deluged God isn’t going to win any awards, but I imagine most players will have a good time. SPOILERS!:
We don’t often get a ship-board briefing in Pathfinder Society, so it’s interesting to start off on board the Grinning Pixie--the mobile Pathfinder lodge helmed by Venture Captain Calisro Benarry. The ship is moored off Tempest Cay, the northernmost island in the Shackles, and Benarry explains that strange winds around the area have altered currents and tides and made visible the wreck of a ship called the Pride of Aspenthar. As told in PFS1 # 7-19, the Pride of Aspenthar was sent on a mission to the Gloomspires but never returned. Benarry wants the PCs to board the wreck and try to figure out why it sank. To help them out, she provides the group with some potions of water breathing, a feather token (swan boat), and a wand of touch of the sea. By Season 9, the Pathfinder Society takes a lot better care of its agents compared to the early seasons! The wreck is visible on the outer edge of a coral reef. As the PCs cross the reef on foot, they’re attacked by the traditionary giant crabs (and a crab swarm, which might prove more challenging to a low-level group if they’re not prepared for fighting swarms). Exploration of the ship itself requires fighting off some zombie sailors (been there!) before discovering of the captain’s log and why the ship sank: a mutiny followed by a collision with the reef! Importantly, the log contains the captain’s suspicions that someone or something had been manipulating the currents around the reef with magic. The PCs are expected to follow another vague clue (found by peering through a spyglass on the rail) to a nearby sea cave, but if they miss the clue (which seems likely) the currents take them to the sea cave anyway when they try to leave! A bit of forced plotting there. The sea cave features two encounters that can be resolved through either role-playing or combat. The first is with an injured triton named Nalu and his hippocampus mount. Nalu was on a diplomatic visit to another undersea community when the currents pulled him in and he was dashed against the rocks. The second (and the one more likely to start a fight) is with a young brine dragon named Tempest Monarch. Tempest Monarch, like many brine dragons, is ambitious and bombastic, and wants the PCs (“lesser beings”) to “swear fealty” to them. I liked this encounter because it’s a good way to seeing just how prideful most PCs really are. Tempest Monarch’s “lair” is near a planar anomaly, which is why wind and currents have been so strange. When the group leave the sea caves, they may assume they’re done with the adventure, but they haven’t counted on the Cult of the Eye! The cultists consider the sea caves sacred, and unless the PCs do some fast talking, there’ll be a battle. After getting past them one way or the other, the group can then return to Venture-Captain Benarry to report in. As a final note, one bit I really liked on the Chronicle is that if you do “swear fealty” to Tempest Monarch, you get a rare “negative boon”—you’ve got to bring her treasure or she spreads word that you’re an oathbreaker, costing you Prestige Points. A fun addition. I got to experience a battle firsthand on River Crossing during a Pathfinder Society scenario last week. I learned that giant crocodiles are no match for alchemist bombs, but dwarves and nagajis need to watch out for spiked pit traps! Anyway, this flip-mat has two sides. One side is a straight river crossed by a wooden bridge, with trees on either side of the path leading to and from the bridge. It's a solid design, and surely useful in a wide variety of contexts. The other side depicts a bend in the river with some boulders and a potential (but hazardous) place to ford in the center. Again, pretty useful. My only suggestion is that it would have been nice if one side hadn't been set in a traditional forest--a jungle river, a partially frozen river, or a river in the mountains would have added to the flip-mat's versatility. As Big as It Gets!NO SPOILERS Skeletons of Scarwall is the fifth chapter in the Curse of the Crimson Throne adventure path. I ran it in a traditional live tabletop campaign using the updated PFRPG hardcover collection, but this review focuses on the original 3.5-era adventure. This chapter has a heavy dungeon crawling element, which some groups will love and others loathe, but I want to emphasize that it's a really excellently written dungeon crawl with lots of creativity, flavour, and integration into the setting. It's also a bear for the GM to prep! Overall all though, my thoughts are generally positive. Anyway, there's a lot to talk about in this ish, and it happens to be moving day in Castle Jhaeman, so let's just dive right in! This first section, non-spoilerly section of the review will only discuss front- and back- matter, not the adventure itself. Start with the cover. I really like the background image with the skeletal knight (notice the orc heads dangling from his lance?). Lini, the druid, may not have been the most fitting choice for the adventure within, but it's hard to argue with Wayne Reynolds art. The inside front cover continues the "Korvosan Hierarchy" chart, with some members of the hierarchy reddened to indicate they're dead! I have to admit I've never noticed the inside back cover until this very moment; it's a hierarchy chart as well, but of a very different (and even more ominous) kind, but has to do with the adventure itself so I won't talk about it here. The foreword by Wes Schneider talks a lot about drawing inspiration from gothic horror, and provides tips for GMs on making things atmospheric. I can confess I tried *really* hard with the atmosphere by making everyone play in the dark by candlelight to really amp up the oppressive feel of the adventure, trying to can the OOC chatter, etc., but--the players hated that style of play! After a few sessions I was forced to give up. It's hard to find a group that is simultaneously a) into the extreme crunchiness of Pathfinder and b) into deep atmospheric role-playing. The back matter consists of four major parts (or a fifth, if you want to count the two pages containing stats for Level 12 Iconics). First is an overview of the Hold of Belkzen (6 pages). It contains a really nice, detailed map of the region, with just one flaw: no scale bar! The text provides a ton of great adventure hooks, however, and it remains a solid gazetteer. I know there's a full campaign setting that expands considerably on the material, but as an overview, these six pages remain quite useful. Next is an entry on Zon-Kuthon (6 pages). It's a detailed, grisly, and frankly great description of the Midnight Lord and his devotees. The artwork of Zon-Kuthon himself is pure nightmare fuel! And indeed, there's some elements (like the Joyful Things) that I don't think would be deemed appropriate in today's more PG-oriented Paizo. The text is broken down into headings: Temples and Shrines (I'd like more location-specifics here), A Cleric's Role, Two Myths (the myth about Nidal and the "first shadow" is really cool), Aphorisms, Holidays, Relations with Other Religions, Priests of Zon-Kuthon (two capsule descriptions), and Planar Allies. I'm sure much of this material has been collected and reprinted, but it remains an excellent overview. Third is "A Friend in Need", the next short fiction chapter describing Eando Kline's journey in pursuit of a mysterious object (frankly, I forget what the Macguffin is he's chasing after; this tale is more about the journey than the destination). In this instalment, Eando and his new half-orc companion Joskan travel through the Hold of Belkzen on the way to Urglin. However, as outsiders, they need a tribal chief's token to avoid being murdered on site. Negotiations take place with a nearby tribe for such a token, when a (genuinely) surprising betrayal occurs. This story shows why it's really handy to speak multiple languages in Pathfinder! There's also a great depiction of an ankheg stampede. I'm looking forward to reading all of these instalments as an e-book someday. Last up is the Bestiary (14 pages). The first two pages are flavor text and a wandering monster chart for one of the major regions the PCs are likely to traverse in the adventure. Next up are two-page-long entries for several new monsters. The Chained Spirit is a cool, original concept (a ghostly creature that is "anchored" to the Material Plane by living creatures). But watch out for those four Charisma-draining chains (nasty!). The Danse Macabre (a pack of ghostly dancers haunted by the grim reaper) is also pretty cool and pretty scary--with a scythe that does Constitution drain! Gugs are Lovecraftian beasts with terrifying maw-heads. The Prince in Chains is the Herald of Zon-Kuthon, and certainly not something you want to encounter. The section ends with a four-page-long entry on the first new true dragon to be introduced to Golarion: umbral dragons! It's pretty neat that they feast on incorporeal creatures! SPOILERS!:
Long story short, Skeletons of Scarwall is all about a massive, extremely haunted castle! The AP goes into extensive background about Castle Scarwall, and this background heavily ties into the threats the PCs face when they enter to explore it. It's a fairly interesting story, and it's worth the GM learning the broad contours to draw upon for running the adventure. Part 1 (6 pages) contains the Sun Shaman's Tale, as he explains to the PCs that they need to venture to Castle Scarwall to retrieve the legendary sword Serithtial, a holy weapon forged to combat the followers of Zon-Kuthon that will be crucial for defeating Ileosa and the Crown of Fangs she wears (the Crown of Fangs itself is tied into the history of Castle Scarwall and its former ruler, Kazavon). This section of the adventure is mostly exposition and, presumably, PC preparation. Castle Scarwall is located in the Hold of Belkzen, far away from Korvosa. The adventure assumes that, by this level, the PCs will be using magical means of transportation, so there are no scripted encounters along the way. Indeed, my PCs windwalked their way there. In terms of preparation, it's interesting that the GM knows Scarwall will be a truly massive dungeon and exploring it will take up the entire remainder of the chapter, but the players aren't really sure what they're in for; some of mine apparently initially assumed it'd be a quick in-and-out! Two members of the Brotherhood of the Bone are waiting for the PCs outside of Castle Scarwall, and they propose a truce. This is a good opportunity for some role-playing and the adventure definitely changes depending on whether the PCs accept or reject the truce, and which member of the Brotherhood they befriend. Part 2 (4 pages) is "Approaching Scarwall". It details the Deadwatchers, an orc tribe devoted to ensuring nothing goes in or comes out of Scarwall. I like them, and they have a good backstory, but at this level they're nothing but a forgettable speed bump to the PCs. Of more importance, this section has a description of what different dangers await the PCs if they approach Scarwall by land, by air, or by water (as it's surrounded by a crater lake). What this section urgently needs is an art piece of what Scarwall and its surroundings look like from a distance. It's really hard to piece together how exactly the castle sits in the lake, how the different levels look from outside, where the various exits and entrances are, etc. I found a handy 3D model on Youtube and showed it to my players, and that was a tremendous help (to them and to me!) in trying to conceptualize the place. Part 3 (40 pages) details Scarwall itself. This is by far the *largest* and most complex standalone structure I've ever had to prepare. I've got a lot of blank flip-mats, and this one stretched my resources to the limits! There must be something like 200 rooms (even more in the hardcover!) and a *lot* of encounters. (In a way it's equivalent to Chapter Five of Rise of the Runelords, which was also a combat-heavy way to get the PCs a lot of XP to prepare them for the final chapter.) But the thorough backstory informs which foes are chosen, so Scarwall is certainly not just a lazy exercise in stocking empty rooms with generic monsters. There's a lot to love about it, including the potential soul trapping if a PC dies within! The presence of a Chained Spirit means the PCs may face a steep learning curve (mine did) before realising just what they need to do and how to do it. This is certainly an experience that will test the PCs' resources (and perhaps patience) and the GM's preparation and game management skills. Online, I know that some groups were frustrated by having another chapter set completely away from Korvosa, so some GMs reworked things to bring it closer to home and the AP provides an alternative too. In any event, assuming (a big assumption!) the PCs are successful, they'll break the curse of Scarwall, retrieve Serithtial, and be ready for a big (and dangerous) homecoming in Chapter Six. There's a lot more I could and should say about Skeletons of Scarwall, but time and space are limited so I'll just sum it up by saying it's not everyone's cup of tea, but I for one enjoyed it. And as either a GM or a player, it's not an experience you'll soon forget. NO SPOILERS Jeepers, I need to catch up on these reviews--I finished playing this one in June of 2023, and it's now May of 2024. Raid on Cloudborne Keep is memorable to me in that my PC died in the first encounter! Fortunately, undine psychic-monk Arrius Vext continues to walk Golarion as I had enough Prestige Points to get him raised. But enough about me! Raid on Cloudborne Keep is the last scenario of Season 8 and (I assume) leads into the big interactive special that would finish that season's meta-plot. As an adventure, it has a reasonably interesting setting, but (apart from the opening) it's fairly rail-roady and, underneath the cool decor, is pretty combat heavy. It's also bloody *hard* for those (admittedly rare) groups who don't have an over-powered PC or two in the ranks, and TPKs are certainly possible. I'd place this one relatively far down on the list of PFS scenarios to experience. SPOILERS!:
Raid on Cloudborne Keep starts in the city of Port Eclipse in the Plane of Air with a briefing from Venture-Captain Norden Balentiir and a suli named Ashasar from the Concordance of Elements. I imagine there must be a lot of backstory to all of this throughout the season, but the scenario does a reasonable job of filling in the essential bits: the Pathfinder Society is working towards releasing a captive elemental lord named Ranginori. However, Ranginori's rival, Hshurha, doesn't want that to happen. But this time, the PFS is going to move first by taking out one of Hshurha's key lieutenants, a belker (air monster) named Grasping Storm. It's a little like on Survivor when a rival alliance leader can't be targeted for some reason, so you go after their number 2 instead to weaken them. Grasping Storm reigns over a castle on the Plane of Air called Purest Air, and is currently assembling mercenaries to help his master. Thus, the PCs are tasked with getting on one of the airships ferrying mercenaries to the castle, hopefully disposing of those mercs along the way, and then taking out Grasping Storm. To be honest, it's basically an assassination mission! The scenario is a bit open-ended on boarding the merc-ferrying airship, with possibilities ranging from bribery to stowing away to fighting and essentially taking it over. As written, this is a big part of the scenario, and would be perfect for those skilled in Bluff, Disguise, Stealth, etc. The group I was in hatched a plan to stake out the docks near the airship so we could dispatch the mercenaries before they even got on board (and thus pretend we were them). But, as my PC's death showed, that plan sounded better in theory than in practice. The mercs are air elementals and invisible stalkers, and the former's whirlwind ability rampaged through our ranks. Thus, I spent the rest of the scenario observing. For what it's worth, the scenario makes smart use of what I imagine is a rarely used Flip-Mat, Airship, and has cool artwork for the ship's captain. The airship docks with Purest Air's roof (again making great use of a Flip-Mat, this time from the Elemental Planes Multipack), where the PCs encounter guards in the form of a "hala demon" named Bothizar and some mephits or drakes (depending on subtier). This probably ends in a fight, but if the PCs managed to successfully disguise themselves as the mercenaries, they can get into the castle proper. Here, it turns out that Grasping Storm has planned some (potentially lethal) "tests" for his mercenaries, so, in the words of the Killers, 'there's gonna be opposition--ain't no way around it'. These "tests" take the form of a nasty hungry fog, cloud golems, sylph druids, and more. Assuming the PCs make it through all of that, they can then confront Grasping Storm itself, a unique belker. Much of this fighting is in a three-dimensional environment with the special rules for movement on the Plane of Air. It's always harder rules-wise to handle 3D environments whether it's underwater or aerial combats, and I certainly wouldn't recommend this scenario for novice GMs or players. Overall, I'd say Raid on Cloudborne Keep was well-written, but just pitched for the wrong crowd. It really should be in the "Bonekeep" vein of special adventures for well-experienced players running combat-hardened PCs prepared for some of the harder challenges the game has to offer. For an average group of generalists, I fear it may be overwhelming. Having completed a couple of adventure paths as GM and gearing up for my third, I felt I had enough experience under my belt to see about implementing some of the alternative rules systems from Pathfinder Unchained. The book presents 254 pages of different or additional ways to do things in Pathfinder, and it’s certainly worth a look if you’re planning a new campaign—chances are there’s something for every GM. These aren’t little things like a new feat, but major redesigns of entire classes, monster creation, magic, and more. The only caveat is that the more you stray from the Core rules, the more unresolved issues are likely to arise, so think carefully through the implications of a change and make sure players are willing to buy in to any adjustments. Anyway, there’s a ton of material to discuss, so let’s get to it! I’m not a big fan of the cover. The golem or animated statue or whatever it is has a crazy narrow waist that really annoys me for some reason, even though I do acknowledge the whirling chains are a nice nod to the book’s title. The introduction (2 pages long) notes that Pathfinder was released seven years earlier (at that point) and that it’s time to offer a workshop full of tools for GMs to select from to update and customise their game. It provides a brief but useful overview of the major new changes, and is worth a skim. Chapter 1 is “Classes” (36 pages) and contains the most widely adopted changes across the Pathfinder community. The chapter presents new “Unchained” versions of the Barbarian, Monk, Rogue, and Summoner, and even PFS allows them because they are almost unanimously accepted as more playable (and better balanced) revisions. The Unchained Barbarian has simplified calculations for rage duration (though it still lasts too long, in my opinion) and makes it easier to use rage powers. The Unchained Monk has a simplified Flurry of Blows and new ki powers for versatility. The Unchained Rogue gets skill unlocks (discussed later) and important abilities like debilitating injury, weapon finesse, and (eventually) Dex to damage. The Unchained Summoner is frankly a nerf, but a much-needed one; the biggest change is to the eidolon, but it also fixes the Summoner spell list. I’m happy with all the class revisions, and I only wish Paizo got around to making Unchained versions of some of the other problematic classes out there. The chapter also contains a new method to compute BABs and saves to help multiclass characters, but it looks too complicated to me. Finally, there’s a new “staggered advancement” mechanism that sort of allows a character to partially level up as they go instead of doing it all at once when they reach a new XP threshold; I think it’s more effort than its worth. Chapter 2 is “Skills and Options” (44 pages). It starts with an optional “Background” skills system, which essentially gives each PC a free rank each level to spend on a non-combat oriented skill like Craft, Perform, etc. I tried it once in a previous campaign but found it was rarely used to flesh out a character and was instead just dumped into learning another language or another point in a Knowledge skill. I do like the expanded skill uses for Craft, Perform, and Profession—they’re easy to integrate into a campaign because they essentially give the GM a list of uses and DCs to make those skills more valuable in ordinary gameplay (such as using Craft to determine what culture made an item, for example). Another optional change is a consolidated skill list that cuts the number of skills in a third! This is essentially what Starfinder did, and I’m not a fan at all because it makes for too much homogeneity within a group. Another proposal is “grouped skills” which makes PCs more broadly skilled but less specialised; complicated but interesting. Next, there are alternative Crafting and Profession rules. I like the changes to Crafting (simplifies and details DCs better) but it doesn’t address magical item crafting which, frankly, is the most likely to be used and abused. The changes to Profession are only for running a business. Perhaps most pertinent are the “Skill Unlocks” for Unchained Rogue (or any other PC who takes a particular feat)—these allow a character who has 5, 10, 15, and 20 ranks in a skill to gain a particular ability with that skill. These aren’t game-changers for the most part, but they do speed up their use or remove penalties, and are worth having for the most part. Last, there’s a new way to handle multiclassing; essentially, you give up feats to get the secondary powers of another class. I found it interesting but ultimately unsatisfactory. Chapter 3 is “Gameplay” (46 pages) and is a real grab bag of options. The first involves alignment: either making it a bigger part of the game by tracking PCs’ alignment more finely and providing bonuses accordingly, or removing it altogether (which would require a *lot* of GM legwork). Some people like the revised action economy (a version of which was implemented in PF2), which changes the admittedly initially confusing dichotomy of Free/Swift/Immediate/Move/Standard/Full to just “Simple” and “Advanced”. However, I’ve also heard issues with how it handles certain classes. Another proposal is to remove iterative attacks; it looks interesting but too complicated for easy adoption. Next are “stamina points” and “combat tricks”—basically, a pool of points to use for a bonus on an attack or to do certain tricks that improve combat feats; I could certainly see using this. Also tempting is the idea of “wound thresholds”, which means there’s a degradation of fighting ability the more hit points are lost—this would create some new tactical considerations though it would also require some more GM tracking. Last are Starfinder-style disease and poison progression tracks, which make them *much* deadlier (I think they’re too hard to integrate at this stage in Pathfinder, however). Chapter Four is “Magic” (38 pages). It starts with “Simplified Spellcasting”, in which a spellcaster only prepares spells for their three highest spell levels with all lesser spells grouped in a pool; this provides them even more flexibility, which is anathema to those (like me) unhappy with the caster/martial disparity at higher levels. Next are “Spell Alterations”, and some of these are more my jam: limited magic, wild magic, spell crits and fumbles, and material components have a cost for every spell (old school!). I know a lot of groups use the “Automatic Bonus Progression” rules, which provide a fixed bonus at each level so that the “Big Six” magic item slots can be used for more interesting and flavourful things than just stat boosting gear. Next are magical items that scale; I think one or two of these in a campaign could be really fun (and manageable), though I wouldn’t want to overdo it just because of the complications. Last up is a new way of handling magic item creation that involves the whole party overcoming challenges in order to add unique powers to items; it’s certainly flavourful and worth considering. Chapter Five is “Monsters” (62 pages). It presents a whole new (and allegedly much faster) way of creating monsters. It’s the method adopted in Starfinder, and is based on arrays and grafts rather than building a creature from the “ground up”. I’m personally not a fan of it (I like knowing monsters follow the same “rules” as everyone else), but I do sympathise with the homebrewers out there who want a faster way to stock a dungeon with custom creations. And that’s Pathfinder Unchained. If you’ve been playing or GMing for a while and have a good sense of the Core rules, it’s certainly worth a look. NO SPOILERS Ghost Level Delve is a Starfinder Society scenario for Levels 1-4. It's the first Season Five scenario I've played, and I experienced it through play-by-post at low subtier with my fun journalist character, Vitellius Korpopolis. The scenario is well-written and makes a smart connection to the aftermath of the Drift Crisis event. It provides some intriguing hints to some of the mysteries of Absalom Station for experienced players while being perfectly approachable for new ones. Although the overall tone may be a bit too light for my personal taste, I can respect a quality scenario and Ghost Level Delve is certainly one of them. SPOILERS!:
The premise to Ghost Level Delve is that, after the Drift Crisis, Absalom Station has been flooded by thousands of refugees that threaten to swamp its capacity to house them. Rather than turn them away, one possibility is to allow them to settle in the so-called "Ghost Levels", an area of the Spike that has always been barred to inhabitation (or even organised exploration) because of the dangerous, bizarre creatures and ecosystems reported to lie within. But with the recent crisis, the Starfinder Society has pushed to be allowed to start clearing the "Ghost Levels", and the PCs (in a briefing held by Zigvigix and Harmony of Many) are assigned to the task. The Starfinders are instructed to aid a new community called Fullbridge which is located right on the edge of a Ghost Level. It's a strong and interesting adventure hook. (because I'm still way behind on storylines, this was my first experience with Harmony of Many and the Advocates and Manifold Host factions; I'd like to learn more) A taste of action comes immediately, as the PCs encounter a group of lashunta refugees being menaced by the "Bulkhead Bruisers" gang. My skittermander Steward character, Officer Swizzers, has a neat boon for fighting gang members, but alas, she wasn't present. The gang toughs can be dealt with through old-fashioned combat or driven away through intimidation. Fullbridge itself is led by a dragonkin named Lourvictrix, a former Knight of Golarion. There are a variety of skill checks the PCs can make here to help the community with everyday issues that have arisen (moving supplies, getting electrical systems operating, etc.) and some brief but flavourful NPCs to interact with. The GM will just need to supply some of the description of the tasks, as the scenario doesn't go into much detail. The heart of the scenario starts when the PCs are approached by Lourvictrix with an urgent request: her bonded partner, a fellow former Knight of Golarion named Elymilra, has gone missing in the Ghost Levels. Good thing there are Starfinders around! This is the set-up that could lead to a generic dungeon crawl, but the writer did a nice job changing things up. There are some non-combat encounters (a "hexoglin" that can be persuaded to stop chewing on power cables and a jububnan who needs help with a coming-of-age ritual), some intriguing exploration (especially a telepathic vision that a barren planet may have once occupied the place where Absalom Station does now!), and of course some hazards and foes (strange crab monsters called "vurchyras"). Elymilra is found unconscious near the latter threat, and I like how, if the PCs are forced to retreat from them and leave her behind, she dies! Rarely will scenarios actually impose failure conditions. Assuming all goes well, the PCs can return with Elymilra to Fullbridge and help petition for the refugee community to become fully recognised. As I said, I enjoyed the premise to Ghost Level Delve and liked the variety of plot elements it featured. I'd be happy to explore the Ghost Levels further, and see what else can be unveiled about the Gap! NO SPOILERS Skitter Warp was Paizo’s Free RPG Day 2022 release for Starfinder. It continues featuring the skittermander crew of the salvage vessel Clutch, with pre-gen PCs at Level 5. I ran it live tabletop for my son’s birthday. The adventure features some excellent artwork, the return of some familiar settings and NPCs from previous Free RPG Day offerings, and solid writing. There’s actually a lot packed in it, which means (depending on how much role-playing occurs) a group might be harried to complete it in a normal 4-5 hour slot. If you liked the previous adventures in the serious, you’ll like Skitter Warp too. SPOILERS!:
In some ways, Skitter Warp is a sequel to Skitter Crash, as it’s also set on the osharu planet of Varkulon 4 and features a return of the Helix Lyceum and NPCs like Ponatia. At the same time, it’s also a tie-in to the “Drift Crisis” event. In an interesting twist, one of the normal group of Skittermanders--Nako--isn’t a playable PC, and is instead replaced by her namesake Nakonechkin (their vesk boss). As we’ll see, the reason for the swap is a fun one that might be a good surprise to the players. Part 1 (“Into the Danger Zone”) starts with a little freeform role-playing, as each PC is aboard the Clutch and gets a chance to describe the fun little memento they picked up from Varkulon 4 during their latest salvage job (Nako is still planetside helping to gather the last of it). But then it’s right into the action, as the Drift Crash strikes, hurtling the planet and the orbiting Clutch into a strange miasma. The Drift Crash threatens to become a literal starship crash, and the PCs have to make some skill checks to keep their ship aloft. If they fail too many of the checks, their ship will have reduced shields for another threat posed by the miasma: a type of ghost ship called a derelict shade. It’s a cool foe for a starship combat, but again Paizo doesn’t have the courage of its convictions and even if the good guys lose, all it means is the PCs take some damage to stamina points (which they can promptly regain with a 10-minute rest and the trivial expenditure of a resolve point). Having played Starfinder since its beginning, I really do think one of its weaknesses is a demonstrated reluctance to let genuinely bad things happen to PCs. Anyway, after the battle, the PCs get a transmission from Headmaster Kiodea at the Helix Lyceum request an urgent visit. Part 2 (“Golden Siege”) has the Clutch descending to the surface of Varkulon 4 and its crew realising that the effect of the strange cosmic storm has been radical! Planar energy has surged randomly throughout, changing the landscape, building, and even inhabitants. The area around the Helix Lyceum was struck by good-aligned planar energy, and its residents have become quasi-angelic beings! However, those in some of the surrounding areas were struck by infernal or umbral energy and altered accordingly. Upon landing, the PCs have to fight off an “infernal nilothera” (a good call back to Skitter Crash where they fought a normal one) before meeting with Headteacher Kiodea. He explains that the city-university has received a threatening transmission, and plays it for the group: on screen is Ponatia, but his head now bears curled ram’s horns and his face is twisted with rage as he vows “vengeance” on the Lyceum. Hundreds of wrath-filled foes soon surround it, and the PCs are tasked with three missions to aid in its defence. They can do the missions in any order, with the one they choose to do last altered to be a little bit harder. One mission involves escorting civilians to safety past some corrupted umbral-infused osharus. I liked how stealth (instead of combat) was a legitimate option for success. Another mission, fortifying the Lyceum’s defenses, is purely skills based. A third mission is a straight-up fight against some undead (bone trooper) osharus. Once the missions are over, Headteacher Kiodea say he may have a true solution to the problem: he’s identified the precise source of the planar contamination, and if the PCs douse it with a mystical cleansing oil, the corruption should abate. Part 3 (“Spring of Evil”) has the PCs travelling to the source of the contamination (the Acavo River), fighting a warmonger devil and (hopefully) avoiding a sinkhole trap before the big climax. Not only must they face “Evil Ponatia” (a fiendish mystic) their friend Nako is present as well--but she’s full of hate and immediately attacks! I love the artwork they gave for her. Smart PCs will have one of the group who’s trained in Mysticism immediately attempt the ritual to reverse the corruption, because otherwise they’ll have a knock-down fight on their hands. Once the corruption is reversed, Nako and Ponatia return to normal, and the crew of the Clutch can head off to another adventure. Playing these Free RPG Day adventures on my son’s birthdays over the years has been a happy and memorable experience, and I should thank Paizo and the author (Jason Keeley) for the opportunity. With Second Edition Starfinder in the works, I’m not sure whether or not the crew of the Clutch will return. I think they’ve got a lot of adventuring left in them, so I hope so! NO SPOILERS Songbird Rescue is the first of the Starfinder Bounties (short, 60-90 minute adventures) that I’ve been able to play in person. I really like the premise for the story, and there’s strong artwork and clever use of one of the flip-mats. There’s actually a fair amount packed into the Bounty, including combat, traps, lots of opportunities for skills, and some role-playing. Given all this, and that it’s designed for Level 1 PCs, it would make an excellent adventure to introduce new players to Starfinder. SPOILERS!:
I’ve always been fascinated by the concept of dead or forgotten gods. It’s amazing to think that there could be a time when a god has thousands or even millions of followers, but that over time, cultural shifts, and new religions, worship in that god could dwindle to the point where few if anyone remembers them. And it’s not unrealistic, as plenty of examples can be found in the real world (there’s a memorable H.R. Mencken quote about it). All that leads into why I find the premise behind Songbird Rescue really interesting. The bulk of the adventure is set on Yashu-Indiri, an airless moon around Bretheda, that is littered with shrines to dead and forgotten deities. An android named Sharaphine is part of an order of mystics that maintain some of the shrines when she suffers a terrible accident when one collapses on her. After spending three days digging herself out, she finds herself emerging at the base of a shrine to Zyphus, the god of accidental death, disasters, and tragedy! Epiphany strikes, and Sharaphine finds a new patron. Immediately, she engineers “accidents” to kill the others in her order and then hatches an even crazier plan: she assembles a device (a “calamitter”) to foul the navigational landing systems of ships approaching Yashu-Indiri to create “accidental” crashes! It’s a pretty cool backstory to the adventure. The Bounty starts with the PCs aboard Songbird Station (a performance venue/school/temple to Shelyn) in the Diaspora. There, they’re hired by a kobold cleric of Shelyn named Kivi to set out on a rescue mission to Yashu-Indiri. It seems that a Shelynite named Nairon Shalorrh piloted her shuttle on her usual bimonthly visit to the moon, sent out a transmission when she was approaching it, and then hasn’t been heard from since! The PCs are given a rainbow-coloured vessel named Vivacity and promised a couple of hundreds of credits each when they return. Sharaphine’s “calamitter” wreaks havoc on the Vivacity’s nav systems as it approaches Yashu-Indiri, forcing a crash landing. This takes the form of a multi-round skill challenge. A good GM can make this pretty exciting, even if the worst consequences (failing every round of the challenge) is only a couple of dice of damage and the fatigued condition. (Then again, at Level 1, that could be a big impact). After surviving the crash, the PCs find their way to Kivi’s nearby shuttle--a scene perfectly presented by the Crashed Starship flip-mat. Here they encounter Sharaphine and her posse of anacite wingbots. The artwork for Sharaphine is excellent. After (presumably) defeating her, the PCs can begin excavating the shuttle, and that’s where they may meet the most dangerous thing in the Bounty: an electrical trap that could do 3d6 damage--it’s not likely to actually kill any PCs (Resolve Points in Starfinder make that practically impossible), but it could certainly knock one out. The missing cleric, Kivi, is badly hurt but still alive. The PCs need to tread carefully here, as skill check mishaps here could very well kill her. There is where there’s a chance for some role-playing. Having hopefully rescued Kivi, the PCs need to locate the “calamitter” and disable it before repairing their ship and setting off back to Songbird Station. This only takes a couple of skill checks (that can be repeated without failure), so shouldn’t be too hard. I can’t think of anything to complain about with Songbird Rescue--so that must mean it’s pretty good! NO SPOILERS System Takedown is the third of the “Starfinder One-Shot” series of short adventures designed to be ran in a single session. Although sanctioned for Starfinder Society play, the one-shots come with pre-gen characters and the story doesn’t involve the Starfinder Society. I ran System Takedown live for my kid’s birthday and thought it was a solid adventure with a couple of really fun elements. The Level 5 pre-gens have nice artwork and connections to the other party members to draw upon for role-playing, though I do find the earlier style of Iconic character sheets (with brief descriptions of how their class abilities, feats, and equipment work) much more useful in actual gameplay. I also think the listed playtime of 3-4 hours is probably optimistic, though of course, every group is different. SPOILERS!:
System Takedown is set on the pahtra homeworld of Pulonis, known to the occupying Veskarium empire as Vesk-6. The PCs take on the role of rebels on a mission to bring down a corrupt and particularly brutal Veskarium regional consul named Shethris Nazriar. Although they’ve obtained evidence of his numerous crimes, the rebels know that anything they put on the planetary infosphere will be quickly scrubbed. Thus, the only way to get it out is to infiltrate a military communications facility in a remote jungle and use its emergency planetary broadcast system to send it directly to everyone! In other words, it’s a bit of a combination of Han Solo’s mission on Endor to capture the remote shield generator facility in Return of the Jedi and the crew’s mission to broadcast the Alliance’s crimes in Serenity (Can’t Stop the Signal!). In a fun twist, the entire mission is being live-streamed by the resistance and the GM is given scripted comments from the stream’s “audience” to share at particular points in the story; the PCs get minor bonuses if they follow the (randomly determined) suggestions of the audience. I didn’t do a great job with it, and it might be an idea that actually works better over a virtual tabletop or play-by-post, but I really liked the idea. The adventure starts with the PCs approaching the outpost through the jungle and having to figure out a way to get inside. The approach is guarded by roving patrols of Vesk guards and automated defence turrets. A patient group can study the defences and learn the overlapping routes of the guards and area of coverage of the defence turrets, and sneak through the gaps to reach the entrance door. Or, they can do what my players did, and just attack! Either way, once at the door, there’s a challenging hack. In another nice addition, the PCs on the ground are supported by a remote communications/computer specialist who can aid with advice or even hacking (though it takes longer). Overall, it’s a detailed and well put together encounter. The interior of the base consists of seven rooms. There’s the usual fight against robot guards (first “Incapacitator Robots” and later the much more common observer-class security robots), a trap (spinning force blades), a non-hostile NPC for a bit of role-playing, and an (optional based on time) fight against a shadow mastiff. The main encounter has a good premise: in the communications room, the PCs face an entire system shutdown and have to quickly achieve a certain number of Computers checks in a set timeframe while simultaneously battling the robots. I’m a big fan of time-sensitive encounters that combine combat and non-combat challenges and force the party to make strategic (and sometimes hard) decisions on where to focus their efforts. In another fun addition, Consul Nazriar has learned of the group’s intrusion and sends them mocking messages throughout their time in the facility (though the messages get more and more panicked as the PCs make progress). The climax is great and foreshadowed well through the “livestream chat”. Having realised his career is over, Consul Nazriar steals a freaking mech and tromps down to the base to confront the PCs as they emerge! A Huge-sized mech is a memorable boss fight, and Nazriar is given enough of a personality that there’s plenty to work with in terms of threatening banter. Despite its threatening appearance, the mech actually isn’t that tough, but it does have some cinematic abilities like firing volleys of missiles or grabbing creatures and hurling them into the air. The epilogue is written well: the rebels still have a long way to go, but have improved things in one area of the planet. I’m also happy the PCs got to be rebels, after some of those Starfinder Society adventures where the PCs are expected to take the Veskarium’s side! Anyway, I thought System Takedown was a well-written adventure and would provide a good experience to new and experience players alike. One of the BestREVIEW Todd Stewart has a well-deserved reputation as a gaming guru when it comes to material on other planes, and his work on Book of the Damned, Vol 3: Horsemen of the Apocalypse can only burnish that reputation. The writing in this 64-page softcover book is stellar and it makes a fitting capstone to the trilogy of books that previously covered devils (Hell) and demons (the Abyss). In this volume, daemons (residents of Abaddon) are the focus. Pathfinder’s concept of daemons was new to me when I started playing Pathfinder a decade ago, but I’ve slowly gotten to appreciate them. Whereas devils are lawful and enjoy tempting mortals through linguistic tricks and chicanery, and demons are classic chaotic evil “rip everything apart!”, daemons form the souls of sinful mortals and desire to consume souls in return--their purpose is literally to extinguish all life in the universe. Led by the Four Horsemen--War, Famine, Pestilence, and Death--they fill an interesting niche in the Pathfinder cosmos. I still don’t have my head around them completely, but this book certainly helps. The cover, depicting Charon (the Horseman of Death) is excellent and sets up the flavour of the book perfectly. The inside front cover gives a stylish summary of the four Horsemen, while the inside back cover lists the deities, demigods, and other powerful entities that reside in Abaddon (for each, it includes their areas of concern, clerical domains, and favored weapon). If you need a cult devoted to maggots, accidental deaths, or sewers, this is the place to come! The art design of the book fits the theme really well, though some of the art of particular daemons could be better. The book starts with two pages on the “The First Daemons” and concisely explains what sets daemons apart from devils and demons. Daemons seek the utter oblivion of all mortal souls, and they consume those souls entirely! They’re not after order and hierarchy (like devils) or chaos and pain (like demons), they just want to feed and extinguish life. In this way, they could be the most fearsome of all! Chapter One (14 pages) provides a well-written overview of Abaddon. It includes a sort of gazetteer, with locations that beg for dark campaigns to visit like The Menagerie, the ghastly Mere of Broken Angels, and the Oblivion Compass. The chapter has two pages on each of the Four Horsemen. The writing here is evocative puts the reader in the daemonic mood instantly. There’s a dozen great ideas on every page—but this book is definitely not for kids! Chapter Two (10 pages) has a good discussion of daemons in general, frequently contrasting them with devils and demons. There’s a paragraph or so on each of the particular types, with clear distinctions in their roles and methods. There’s also coverage of “daemonic harbingers” (elite, named daemons that have their own following). Chapter Three (16 pages) has information of more direct relevance for GMs and players. It talks about daemon cults form but how daemon worshippers are fundamentally deluded, because daemons never offer anything in return! The discussion of the soul trade is very valuable (night hags have been part of more than one adventure I’ve seen) and it even lists going rates depending on the type of soul! A new prestige class (Souldrinker) is introduced; it’s pretty cool, building off a spellcaster chassis with energy drain powers to spend “soul points” to activate special abilities. There’s then some flavourful information on summoning daemons (easy to call but hard to contain!). Several new spells are introduced, some of them filling needed mechanical niches when it comes to transferring souls into soul gems, etc. Finally, there are some new magic items--cool, useful, and *very* evil! Chapter Four (20 pages) is a great bestiary. After a couple of pages on miscellaneous denizens of Abaddon (like divs and night hags), it goes on to feature two-page spreads on new daemons: erodaemons (pose as family or lovers to cause heartbreak), lacridaemons (their sobs lure travellers into getting lost), obisidaemons (gargantuan genocide monsters), phasmadaemons (fear killers), sangudaemons (blood-drainers), suspiridaemons (suck oxygen out of the area), temerdaemons (personify accidental death), and venedaemons (death by magic). There’s some great story hooks just from the concept of these daemons alone. Overall, Horsemen of the Apocalypse is an excellent book, and I really can’t think of a single bad thing to say about it. If you have any inclination to use daemons in a game, it is worth seeking out. NO SPOILERS I ran Our Lady of Silver at subtier 5-6 via play-by-post. One of the nice things about it, compared to most Season Zero/Season One scenarios, is that it has a lot of role-playing opportunities. These are pretty free-form, and there are a lot of NPCs that a good GM could really make come alive if time and circumstances permit. The combat encounters were fine (and pretty easy for modern PCs). I’d rank the overall story and use of setting lore a little above average, and I appreciated the connection to an earlier scenario. There’s one twist that may appear a bit forced and that some players may bristle at. Overall though, I’d rank this one as definitely playable. SPOILERS!:
Our Lady of Silver takes place in Katheer, the massive city that serves as the capital of Qadira. After a briefing from the (hardly ever seen in PFS again) Venture-Captain Osretia Cassomiran, the PCs are sent to a wedding feast! The leader of the important merchant family House of Silver (Bashir al-Mudaris) is overseeing the marriage of his daughter (Lujine, the Lady of Silver) to a foreign scholar and Pathfinder, Farendir Faireven. It’s apparently quite a coup for the young man, and for the Society as well because al-Mudaris plans to donate several valuable relics to burnish his new son-in-law’s reputation with the organisation. The PCs, then, are representatives of the Society at the wedding and simultaneously guards to make sure the relics are safely delivered afterward to Katheer’s Pathfinder Society Lodge afterward. The scenario encourages role-playing at the wedding feast, and introduces multiple NPCs to facilitate this. One of the NPCs, Al’Jahar abu-Targos, is the nephew of the deceased Venture-Captain Targos Min-Katheer and is grateful to the society for the return of his uncle’s remains in # 0-3, Murder on the Silken Caravan. I love little connections like that, and the nephew returns again later in the scenario to provide a potentially valuable service. Apart from perhaps faction missions, the role-playing here doesn’t have a set goal and is mostly free-form--so some groups and GMs may really get into it, and others not so much. (I love RP, though I find it hard sometimes to figure out how much time to spend on it when it comes to play-by-post) Of course, the wedding feast doesn’t go off without a hitch! You see, a rejected suitor of Lujine, a merchant-sorcerer named Raamiz Ibn-Chadli, has hatched a revenge plan to discredit the Pathfinder Society and, by extension, Farendir Faireven. He arranges for dervishes from the Fraternity of the Unforgiving Flame to sneak into the wedding and let wild animals loose (lions and elephants) to cause a distraction while they steal the gifts meant for the Society! I like the little sidebar that was included of dramatic events that can happen during the ensuing chaos. I guess it’s a fait accompli that the gifts are stolen, because the premise of the rest of the adventure is that the PCs are trying to recover them. (though it would work just as well if their mission was to track down who was behind the attempted heist) A lead will take the PCs to the Hall of Purifying Flame, the decrepit headquarters of the Fraternity. The combats here are really easy, though I actually managed to land a flaming oil trap which was fun! A search of the premise uncovers Ibn-Chadli’s role in the scheme, which naturally causes the PCs to seek him out at his villa. The scenario provides a fair amount of text on the villa, but there are no maps or encounters there. Instead, the PCs need to find their way out back to where there are slave huts. There, disguised in heavy robes, is Qutirh the Prudent: Ibn-Chadli’s vizier and actually an Erinyes! For an encounter where the monster’s tactics include teleportation and ranged attacks, the map here is *really* small (just one tile from a map pack). Interrogation of Ibn-Chadli’s slaves or papers in his library will point to the merchant-sorcerer’s interest in the tomb of High Priest Ubaidah, and since that’s their only lead, that’s where they’ll likely head. However, there’s a sudden turn of events when a company of three dozen mounted warriors along with several sorcerers appear to arrest the PCs! They’ve been accused of murder, theft, and grave robbing, and are to be taken into custody to defend themselves in the Satrap’s court. It’s a bit heavy-handed and sort of comes out of nowhere, and it doesn’t really lead to anything interesting as success in the ensuing role-playing opportunity is automatic. (in later seasons, writers would get better with using skill challenges to represent situations like this) In other words, it’s a bit of an interlude that throws off the pace of the adventure without adding much to it, apart from perhaps foreshadowing the idea that the PCs are being framed for crimes they didn’t commit. The final encounter is at High Priest Ubaidah’s tomb outside Katheer. Ibn-Chadli has used magic to disguise a couple of ogres as Pathfinders to help him with the grave robbing! I did have fun having large-sized duplicates of a couple of the PCs’ tokens in the ensuring battle. Ibn-Chadli went down like a punk, as one might expect when a sorcerer is forced into melee range in confined quarters. Capturing or killing him clears the PCs of any lingering suspicion, and the return of the gifts allows the marriage festivities to continue. All’s well that ends well! NO SPOILERS I played Call of the Copper Gate with my vigilante (shh!) character, The Shining Knight (a.k.a., Siegfried). I have to admit, I didn't have a lot of fun, but I think that was mostly because the GM frankly wasn't very good. In reading the scenario for the purposes of this review, it looks like a really solid adventure that makes great use of previous PFS scenarios and continues a long-running subplot. For PFS lore aficionados, this is a must-play scenario. For others, it has a good mix of combat and role-playing, and features some creatures and concepts from later in the bestiaries that may be unfamiliar. SPOILERS! Call of the Copper Gate is another adventure involving the long-running saga of the Blakros Museum. Before it was a museum, it was the estate of a powerful wizard and astrologer named Ralzeros the Overwatched. Ralzeros became obsessed with the endless expanses between the stars and the unfathomable creatures thought to live there (the Dark Tapestry) and created an extradimensional observatory to watch them. He reinforced the door to this observatory with a mystically warded copper gate linked to three magic beacons to alert him to danger. In past scenarios (going as far back as Season Zero), the Society has become wrapped up in the dangers presented by the legacy of Ralzeros the Overwatched and its effect on Imrizade Blakros as well as the museum's current curator, Nigel Aldain. Call of the Copper Gate involves these key elements and a servant of an Outer God! The initial "briefing" is a fun and fast start, as the PCs are in the Grand Lodge when alarms sound and Venture-Captain Ambrus Valsin and Paracountess Zarta Dralneen rush around the corner, agitated and arguing. One of the vaults below the Grand Lodge is suddenly being overrun with magical plant matter presumably being spewed from one of the arcane devices stored there. Zarta persuades a reluctant Valsin to let the Dark Archive handle the emergency, and she enlists the nearest Pathfinders she sees (the PCs) to follow her into the vault. There's no time for questions, no time for Knowledge checks, and no time to prep--it's straight into danger! It's a great change of pace from the way scenarios normally start. The vault is filled with fungal strands that are hard to move through and coated with toxins harmful to living creatures because they aren't native to this world--they're from the foreboding planet Aucturn! And more, an "Aucturn Shard Golem" (a variant junk golem) is in the chamber as well, protecting the device responsible for bringing it and the fungus into the vault: a magical beacon (one of the three Ralzeros created to protect the copper gate to his extradimensional observatory). The Shining Knight rushed in to smash the beacon to pieces and would have gotten away with it too, if it weren't for meddling kids a GM mistakenly thinking the scenario didn't allow it. In a nice story addition, Zarta takes part in the battle (though if she has to do everything, the PCs get fewer rewards, which makes sense). Zarta recognises the beacon as something the Society purchased recently from the Arcanamirium (the largest school of magic in the Inner Sea) and says it was one of three. She suggests that if this one has malfunctioned, the other two could as well, and sends the PCs off to find them and place them in special warding containers. At the Arcanamirium, the PCs face the most fearsome foe of all: bureaucracy! I really like it, as dealing with a large institution can be enormously challenging. The PCs eventually find their way to journeyman wizard Maren Fuln (from # 3-07) conversing with a denizen of Aucturn named Nggith-Tsa. This part is handled really well. There's a lot of information to be gained from Nggith-Tsa before an (inevitable battle), and the scenario is detailed about how conversational strands affect the fight to come. I'm not explaining it well, but suffice it to say, a well-prepared GM will find themselves well-supported by the scenario here. Like Zarta, Fuln will also participate in the battle. With two beacons secured, the PCs learn that the third is in the Blakros Museum. Once the PCs arrive, curator Nigel Aldain reports that intruders broke into the basement and have taken Imrizade Blakros prisoner. Nigel joins the PCs in the assault (I like how he tells them he's learned to start preparing combat spells every day given all the previous problems at the museum) where they learn the culprits are cerebric fungi and a psychic worshipper of Nyalathotep (with bad art) named Fylzilka. (I liked that the longer it takes the PCs to bash down the door to the basement, the longer Fylzilka gets to buff--trade-offs like that make for a game where actions matter). The beacon is spewing Aucturn's poisonous atmosphere into the room, so the rare PC who has prepared gust of wind will feel very clever! Imrizade is unconscious from wounds, but if healed, will also participate in the battle. It's nice to see key NPCs be more than just plot- and RP-fodder and instead feel like active participants. With the third beacon in safe hands, the present danger is over--though the lure of the mysterious copper door remains (perhaps for a future adventure?). Zarta asks the PCs to do additional research and write a report on the beacons for her, which is a neat way of allowing them to make a Knowledge (arcana) check for their Day Job if they wish. In the end, I thought Call of the Copper Gate was an excellent continuation of the Pathfinder Society's involvement with the Blakros Museum. Someday, it might be a fun idea to run these scenarios in order as part of a mini campaign.[/spoiler]
|
|