Precisely the Right Way to Play Mummy's Mask
Tuesday, March 21, 2017
Like scourges, triggers, and traders, precision is one of the subthemes of the Mummy's Mask Adventure Path for the Pathfinder Adventure Card Game. This topic doesn't get as much attention because it's not quite as flashy, but we like it because it's a different type of challenge. In this blog, I'll let you know where the idea came from and how it ended up.
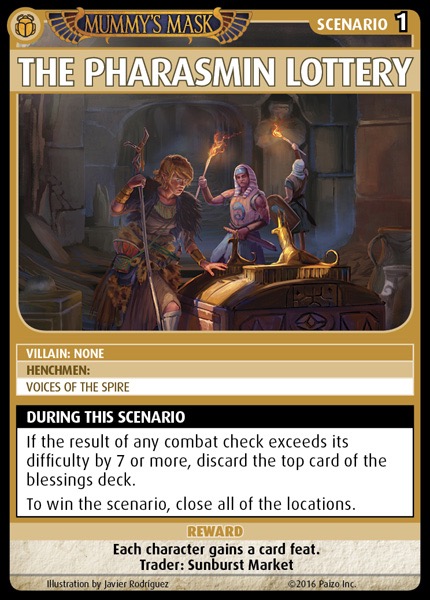
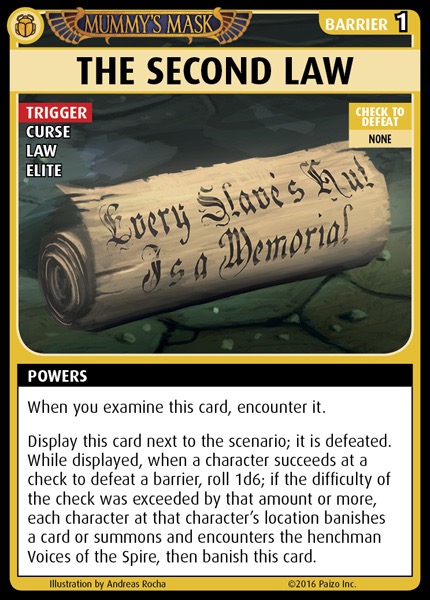
Early on, Lone Shark designers Gaby, Paul, and Liz locked in on a key feature of the Pathfinder RPG version of the Mummy's Mask Adventure Path. Right at the start of the the first volume, you participate in a lottery to win the right to explore and effectively loot tombs in the Osirian city of Wati. The priests of the Grand Mausoleum have a set of three rules that restrict how much collateral damage your adventuring can inflict.
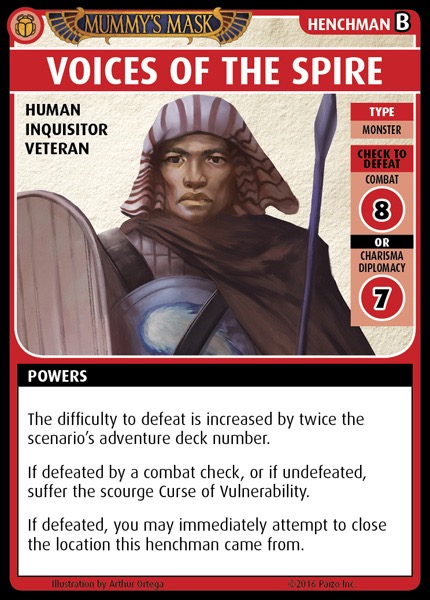
"Remember How This Came to Pass" is a reminder that the necropolis remains a holy place. "Every Slave's Hut Is a Memorial" instructs explorers that willful and unnecessary destruction of tombs will not be tolerated. "Honor the Departed" requires that the dead be treated with respect. These rules are enforced by a militant group within the church of Pharasma known as the Voices of the Spire.
We modeled that in a simple mechanic: If you achieve too high a number in your roll to defeat a bane or acquire a boon, you break something you shouldn't. This makes the Voices of the Spire angry, and they wail on your heads for it.
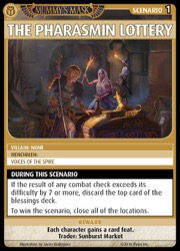


You break it, you buy it.
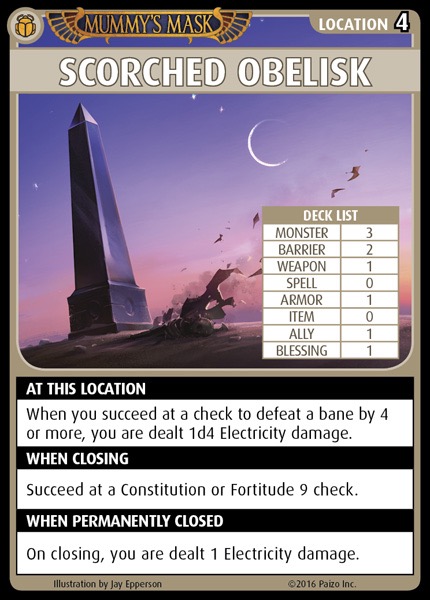
There are places you should also tread carefully. The Scorched Obelisk is a jittery lightning magnet. The Alchemical Laboratory is filled with fragile flasks of acid, so watch where you swing that greatclub. And Ptah knows how you're supposed to guarantee threading the needle in the pottery-littered Sculptors' Lair.
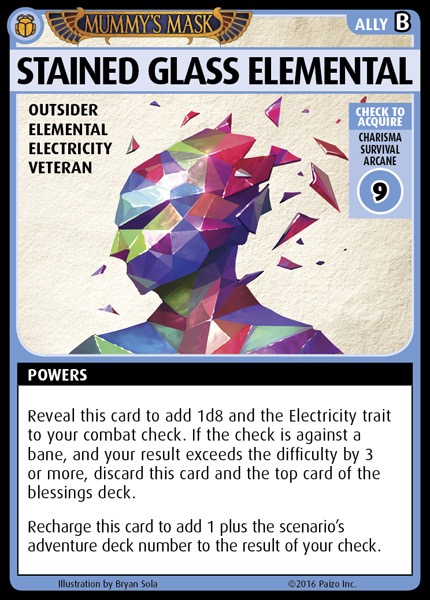
Even your allies don't let you get away with bashing about unchecked. The Stained Glass Elemental shatters at a moment's notice, taking the top card of the blessings deck with it.

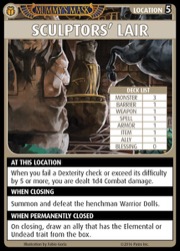

Good news! If you close the unstable Sculptors' Lair, you can get an equally unstable Stained Glass Elemental.
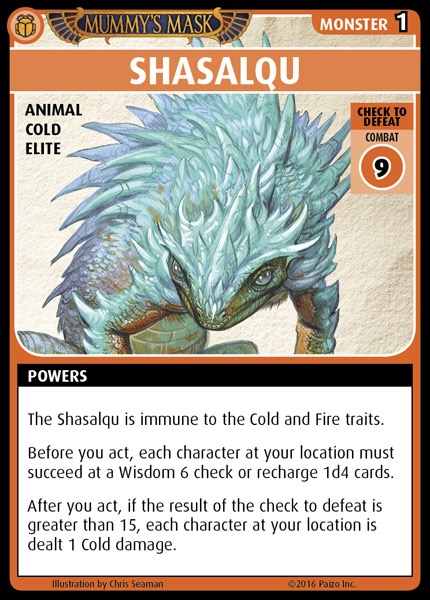
We've offered up several banes that care about the number you roll. The Shasalqu will freeze you with cold if you hit it too hard. The Thriae Soldier will sting you with poison. The Shocking Chest will zort you with electricity. The Yellow Jelly will scorch you with acid. We expect you will fall prey to all those elements at one point or another.
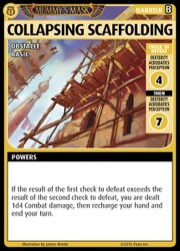
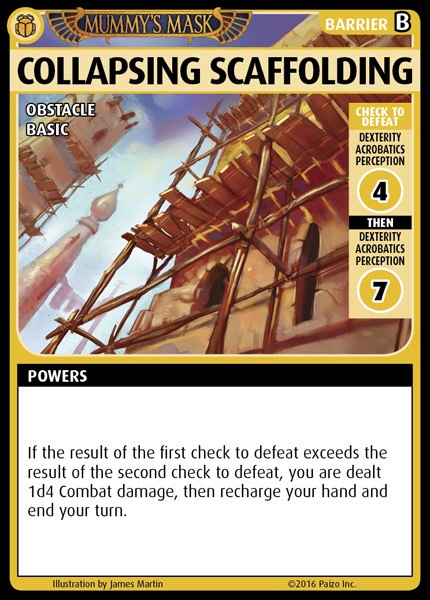
The barrier Collapsing Scaffolding has an even trickier challenge. You must attempt two Dexterity, Acrobatics, or Perception checks, but if the result of your first check exceeds the result of the second, you get smashed by the scaffolding. You'll be tempted to shortchange the first check, even though you only need to hit a 4, maybe by trying that Perception check you never make. And then when you fail that check...
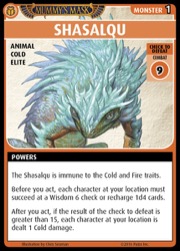

I admit I am not sure how to pronounce "Shasalqu."
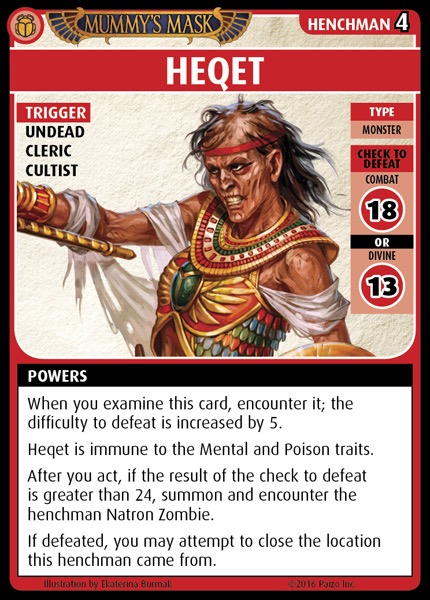
Henchmen and villains get in on this act. If you overroll, the henchman Neqet won't bother damaging you himself; instead, he'll call a zombie buddy to rough you up. In Adventure Deck 4, the villain Half-Fiend Sphinx and the henchmen Userib and Cultist of Areshkagal damage you if you are too overbearing.
The Mining Construct goes the other way, offering you an item if you defeat it by 5 or less. The henchmen in the delightfully named scenario Tomb Raiders Gone Rogue are particularly touchy. Most raiders let you attempt to close your location only when you defeat them by less than 5; otherwise, you've got a lot more exploring to do. But if you do hit under their threshold, you can get a bunch of boons, so moderating your thuggery can pay off in the tombs.
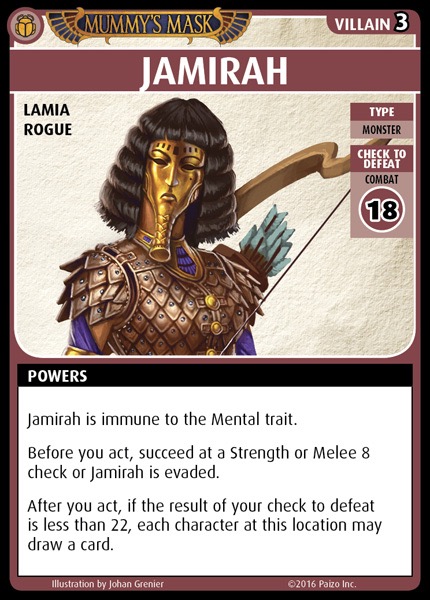
The lamia villain Jamirah also gives you something for hitting a narrow window above what you need to defeat her. (Actually, you get to draw the card even if you roll too low to defeat her, but intentionally losing to a villain is not something we recommend.)

Hmmm. I wonder if she's related to the Wrath of the Righteous villain Shamira?
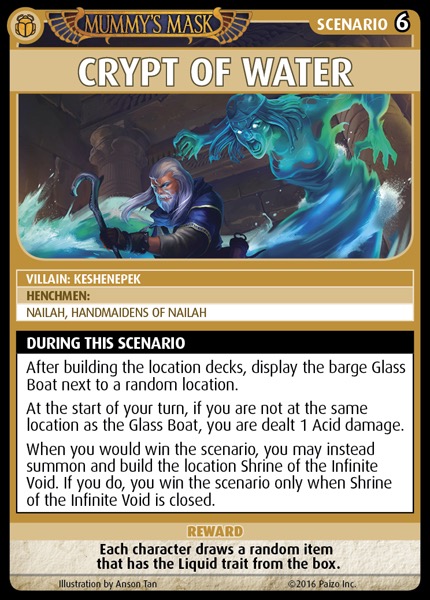
Debuting in Adventure Deck 6 is the Glass Boat, the first and only instance of a new type of support card called a barge. When you're in the boat (and the scenario Crypt of Water will make you want to be), being very precise can get you a free Alchemical or Liquid item. Being a lumbering ox means no potion for you.

We're gonna need a bigger boat.
Fear not, though! We've provided several new ways to get those numbers where you want them. Obviously, there are lots of ways to add static numbers to your checks. Reducing the number of dice you roll while increasing the static number you add will stabilize your roll, giving you some control over your result.
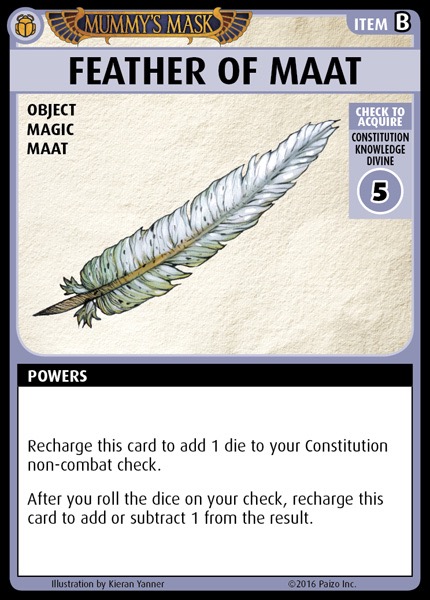
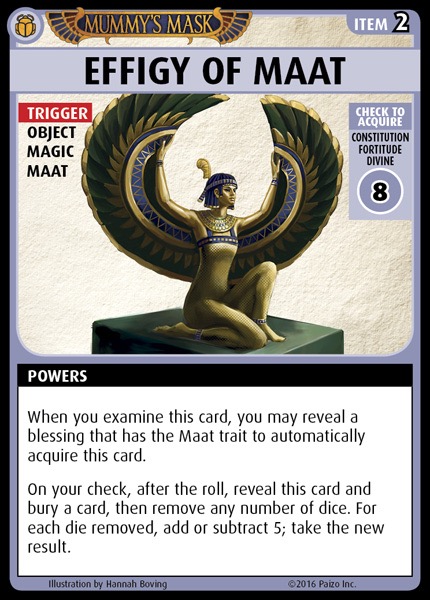
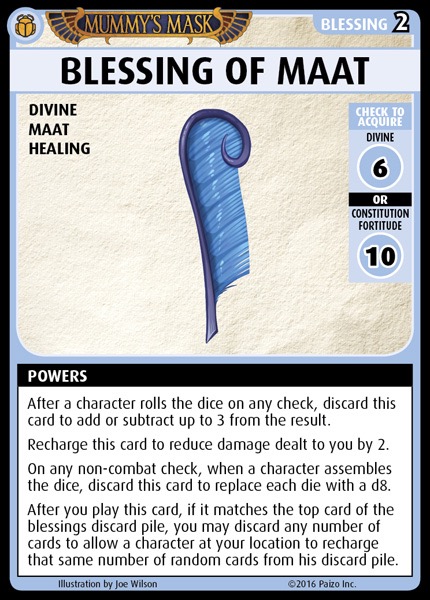
You can't beat the ability to adjust your number after you roll. We highly recommend shifting your object of worship to the law deity Maat. A Feather of Maat is a Luckstone that runs both ways, and the later Effigy of Maat gives you even more versatility. The Blessing of Maat not only allows you to add or subtract 3, but even change all your dice to d8s if that's what you need.


Who ever thought that you'd like seeing the word "subtract" on a card? Maat did.
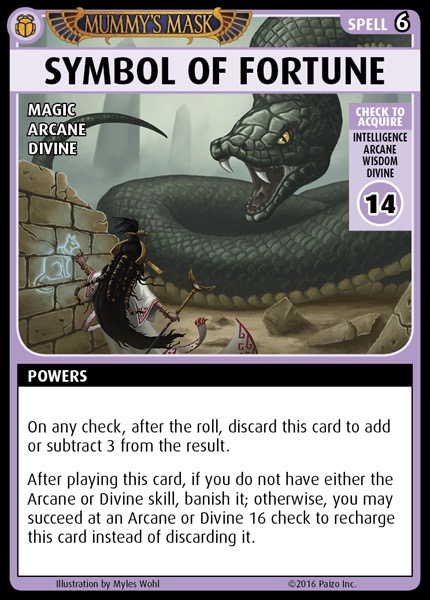
You melee types might want to pick up the Scorpion Whip. Any spellcaster can pick up the Symbol of Fortune, which will add or subtract 3 after the roll. The loot item Tablet of Languages Lost is good for adding to or subtracting from your Charisma check, especially if you're playing a Sorcerer blasting your way through the catacombs; so's the Silken Ceremonial Armor.
The item Jet of Anubis can either add or remove a whole die. Trust me, you haven't lived till you remove the 12 you rolled on your d12. Similarly, the Blessing of the Lady of Graves lets you roll your Wisdom die and subtract it from your result.


I can't play Symbol of Fortune without imitating a game show audience.
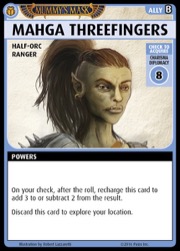
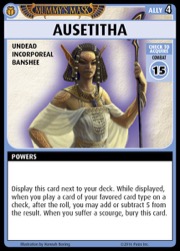
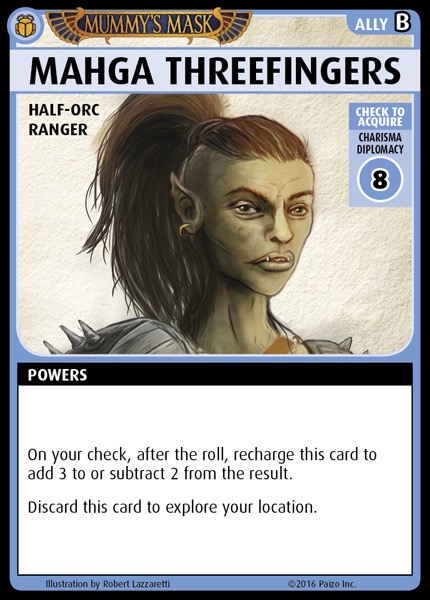
Your friends can also help. The Cleric of Nethys can add or subtract 2 from your roll, while the half-orc ally Magha Threefingers adds 3 or subtracts 2. The banshee Ausetitha can add or subtract 5. (Fun fact: The designers are still snickering about Magha's power.)
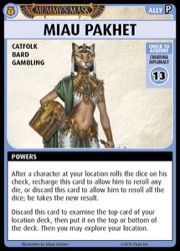
Meanwhile, the promo ally Miau Pakhet lets anyone at your location reroll a die, which is quite useful when you need to be precise. Plus that second power is nothing to flick your tail at.
Dude, you have weird friends.
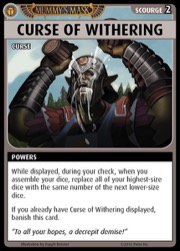
Then there are the more unhinged decisions you can make. If your party has a Remove Curse spell (or if you're Alahazra), you could even pick up a Curse of Withering. Replacing all your dice with lower-size dice can keep those high numbers under control.
If you're in the Garden of Ossumentals, consider adding the Bludgeoning or Fire trait—or both! The first can add a die, and the second can remove one.
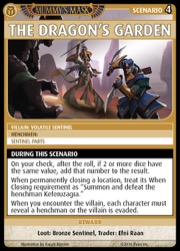
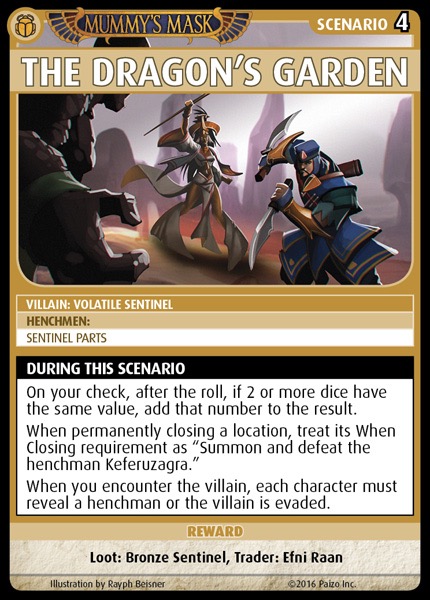
You might consider trying to get all your dice to be small. A Wand of Scorching Ray might not seem great to you Arcane casters, except when not rolling that Arcane d12 is what you want. Suddenly just rolling 4d6 is interesting. Especially if you're playing in The Dragon's Garden...
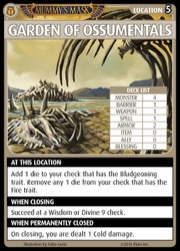
You can even add two numbers to the roll in the Garden, if you roll two different doubles.
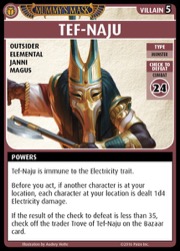
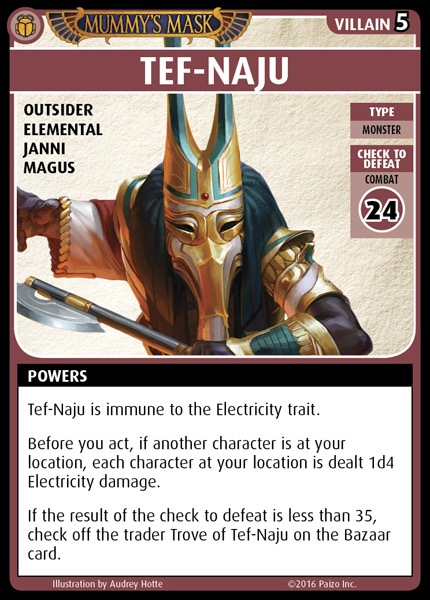
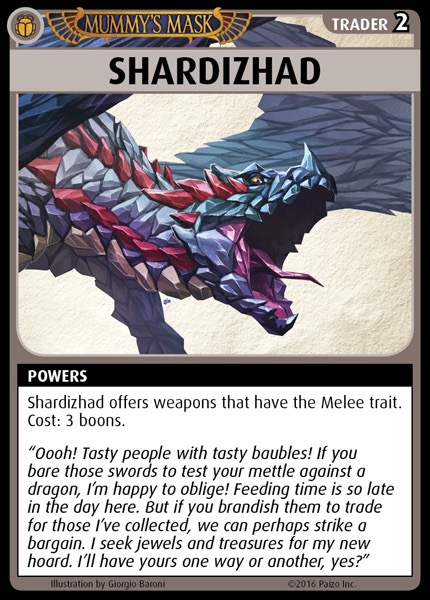
Hey, speaking of dragons, there's our favorite—and what might be your least favorite—use of precision in the whole game. Just like the villain Tef-Naju giving you his Trove only if you roll 35 or less to defeat him, the dragon trader Shardizhad is not impressed easily. She will only trade with you if the result of your check to acquire a boon is exactly equal to the difficulty of acquiring it. Yup, it must be bang-on. If you don't do it, you might be tempted to lose the scenario to get that ability to trade for Melee weapons.

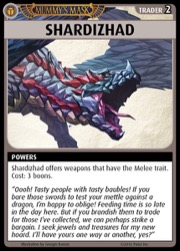
You're about to find out how hard is it to NOT display 3 Elegiac Compasses.
Those are the precise ways you can handle the precision mechanic. Good luck with that, and we hope you enjoy the epic conclusion of Mummy's Mask, which we'll preview next week!
Mike Selinker
Adventure Card Game Lead Designer


We have updated our Privacy Policy.
Paizo.com uses cookies. You can block paizo.com from using cookies within your browser settings, but doing so will hinder site functionality.
More information can be found in our Privacy Policy.