Pathfinder Adventure Card Game Strategy #7—Attempting Your Checks
Tuesday, March 14, 2017
This is the seventh installment of our strategy blog written by game historian Shannon Appelcline. You can read all the installments here.
The heart of PACG is attempting checks to acquire boons and defeat banes. And every check starts with dice that need to be rolled.
Know Your Dice Results
Checks are all about rolling dice, so the heart of managing a check is knowing your dice. Obviously, if the results of a check aren't that important, you should just throw your dice and see what happens. However, if you really want to gain a boon or defeat a bane, then you should understand your odds.
You can calculate the odds of your dice in a number of ways. This listing goes from least conservative (you might lose!) to most conservative (you won't lose!):
- Count dice + sides then divide. Add up the number of dice and all their sides, then divide by 2, then add the modifiers. For example, if you're rolling 1d8 + 1d6+2, add 2 (the number of dice) + 8 (the number of sides on the first die) + 6 (the number of sides on the second die) to get 16. Divide that by 2 to get 8 (that's the expected value of your roll), then add 2 (the modifier) to get your expected result: 10. If the difficulty of your check is also 10, your odds of succeeding are a bit better than 50%. (The example given has 48 possible die combinations. 21 of them give a result less than 10, 6 equal to 10, and 21 higher than 10, so the odds of succeeding are 27 in 48, or just over 56%.) So if your expected result is the same as the difficulty of the check, you will succeed more often than not, but you will still lose often. This method of calculation is also a bit cumbersome for quick counting.
- Count half the sides. This author's preferred technique is to just count half the sides on each of the dice, then add the modifiers. For the 1d8 + 1d6+2 example, add 4 (half the sides on the first die) + 3 (half the sides on the second die) + 2 (the modifier) to get an expected result of 9. Not only is this quicker to count than the dice + sides technique, but it also underestimates a little bit: You'll be under the average by half of the number of dice, so it's a bit more conservative. (Using the example above, you'll want to look for a way to add a +1 to reach the difficulty of 10, which would increase your odds to 33 in 48, or nearly 69%.)
- Count every die as a 2. It may have been Obsidian's Nathan Davis who suggested that you should assume every die you roll comes up a 2. With this method, our 1d8 + 1d6+2 example gets you an expected result of 6 (2+2+2), so if the difficulty you're looking for is 10, you'll want to add 2 dice (of any size) to make up the difference. (Adding even 2d4 improves your odds to above 95% in the example.) This is a very conservative method, but if you use it for the most important stuff, you're rarely going to fail.
- Count every die as a 1. There's only one way to be 100% sure of success: your number of dice plus your modifiers must be equal to the target you're shooting for. Yes, this is ridiculously conservative, but you might want to use this criteria occasionally, particularly at the end of a game.
It's easy to use these methods as a basis for an even more conservative estimate without requiring much more work. Just look at the results in a more ad hoc manner: "I estimate these dice will get me a result of 12 and I need 11 to succeed, so if someone could throw in one more blessing, I'd feel a lot better about it" or "I need an 11 and I expect that from 3 dice, so an extra 2d4 will probably push me over.")
Corollary #1: More dice move things toward the average. If you're rolling just one die, the odds are spread evenly across all the possibilities, but if you throw a whole bunch, the odds will cluster toward the middle. For example, trying to get 5 or more on 1d12 has an 8-in-12 chance of succeeding (almost 67%). But trying to get that on the seemingly similar 2d6 results in a 30-in-36 chance, or just over 83%, while 3d4 gives you a 60-in-64 chance, or almost 94%. So if your expected result is a just a little bit above the difficulty, but you're using a lot of dice, you're more likely to be okay.
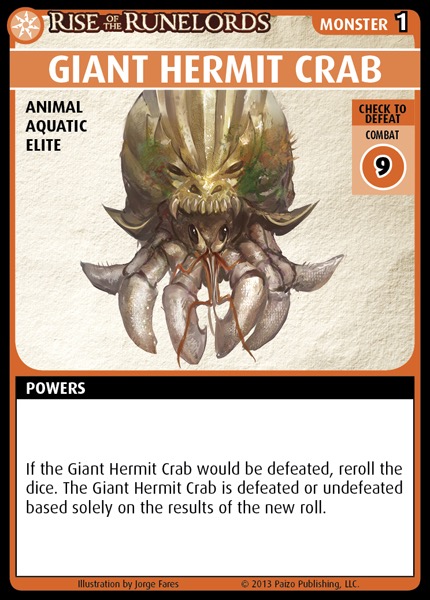
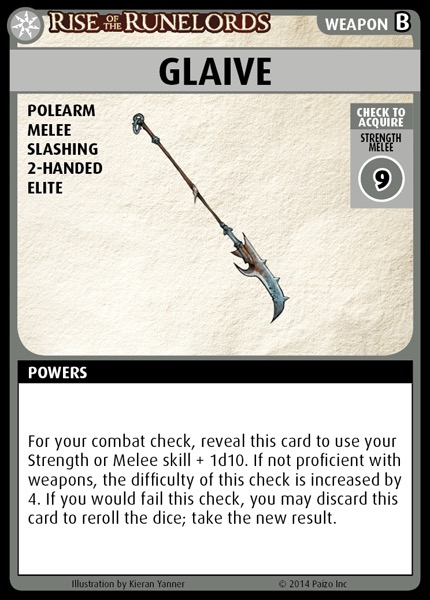
Corollary #2: Rerolling dice changes the average. Some monsters, like the Giant Hermit Crab, force you to reroll on success, while some weapons, like those that have the Polearm trait, allow you to reroll on failure. The math is tricky, but if you're going to have to reroll on a success, you want to be sure you can succeed twice in a row. In such a case, an average only a teeny bit over your target probably isn't going to cut it. On the other hand, when you get to reroll failures, you can be more comfortable with marginal averages.


"So... best 2 out of 3 then?"
Know What Blessings Can Do
Checks involve not just the dice that the cards say to roll, but also the benefits applied by various players, which often come in the form of blessings. Some checks are hard, so blessings can be the difference between having a poor chance of success and a decent chance.
The trick is that blessings also usually represent a potential extra exploration. Don't be afraid of using them, because you don't necessarily need a lot of extra explorations to succeed. But do ask yourself, "Is using this blessing to improve the odds on this check more valuable than having an extra exploration?" Often losing a card, losing a hand of cards, or losing out on a chance to gain a boon turns out to be less valuable than an extra exploration, in which case it's not worth spending a blessing for that check.
Corollary #1: Keep an eye on the blessings deck. Many blessings recharge if the same blessing is atop the blessing deck. Keep an eye on that and the blessings in your hand. If they match, be much more willing to use your blessing. It defers your extra exploration, as you usually have to go through your deck to get it into your hand again, but if you're playing aggressively, it's not lost to you.
The exception is, of course, late in the game. If you're not going to cycle through your deck and you're not going to get your deck shuffled by healing or some other means, then you should treat discarding and recharging the same (and burying too, for that matter).
Corollary #2: Don't bless low skills. Don't waste your blessings on d4 skills unless things seem quite dire. A blessing just doesn't add much to a bad skill. (To be precise, it adds an average of 2.5 to a roll, where spending that blessing on a d12 skill can be over twice as good, adding an average of 6.5 to the roll.) Heck, it can feel wasteful to spend a blessing on a d6 skill.
If a low skill needs help, look instead to powers and spells. If you need to help someone with a bad skill, it's more effective to use certain spells and abilities. Lem can often add up to 1d4+3, while an Aid spell can add a d6 and a Strength spell might add a +3.
Corollary #3: Don't bless excessively (or otherwise overcommit). Whether you're playing blessings, spells, ranged weapons, allies, or some other boon, you don't want to overdo it, yet there's a tendency for players to put too many dice into a pool. When you roll two or three times your target number, and the check wasn't to close a location or defeat a villain, you probably wasted resources that could have been used to take extra explorations or to give a player better odds on another check.
If you count your expected value and you're over your target by more than half, or you've got more than a few extra dice, consider if you really need everything that's in the pool, especially if getting there required discarding or burying cards.
Next time: Managing your encounters.
Shannon Appelcline
Game Historian

We have updated our Privacy Policy.
Paizo.com uses cookies. You can block paizo.com from using cookies within your browser settings, but doing so will hinder site functionality.
More information can be found in our Privacy Policy.