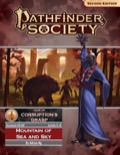
Sign in to create or edit a product review. So, after 30+ years of AD&D, 2nd edition, 3rd edition, 5e, and PF1, I used this scenario as the introduction to PF2e for myself and my players. Not surprisingly, it took us much longer than expected to get through the scenario (we ran this at low tier), but we all enjoyed it and they’re looking forward to running another session in PF2e. By that score alone it was a resounding success! Please don’t read further if you wish to avoid spoilers. The setting is a nice change of pace, and my two players of Asian descent loved this as an introduction to Tian Xia, as everything else we’ve run so far has been in the Inner Sea. Their eyes lit up at the encounter with the kodama. The NPCs are pretty engaging. The scenario itself is easy to run and consists of a completely unnecessary preliminary combat, 3 tasks (1 social, 1 skill-based, and 1 combat) followed by a final combat encounter. The skills-based task was a letdown, as I’m not a fan of skill-based tasks that are overly programmed. It’s literally just a series of forest encounters with different obstacles and skills checks to overcome them, with no real room for player creativity. On the other hand, another task has a very basic obstacle to overcome (a gap in a mountain path with a broken bridge) and the typical hilarity ensued as the Party used different skills to make it across. Yes, it was skill-based, but they had to think of how to use their skills. The final combat is quite challenging and the single opponent is both tough and a heavy hitter, and just very cool looking. Due to some bad tactics on my part they did manage to back it into a corner and they ended up just trading blows until they finally killed it. 2 PCs ended up at 0 hp, although the remaining 2 PCs defeated the opponent and saved their companions. Overall, a very strong scenario with just a couple of weak spots (the preliminary combat with boars and the skill-based task). 
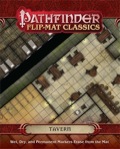
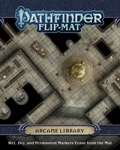
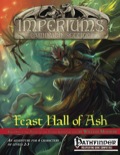
Pathfinder Pawns: Curse of the Crimson Throne Pawn CollectionPaizo Inc.Print Edition Unavailable Add PDF $9.99 Has almost everythingThe pawns in the collections are excellent quality and look great. My only problem is that it doesn't include everything that can't be easily obtained elsewhere. I understand not including a bunch of Eel's End enforcers, as it's easy enough to use some thuggish looking NPCs from other sets. But why call for 2 necrophidiuses in the adventure, for example, when only 1 is available in the Bestiary 2 set and none are provided here? It's kind of a specific monster, and not easily replaceable. Similarly, the adventure calls for 4 wererats, but the Beastiary 1 only provides 1 and none are provided here. I would have gladly paid another $10 to $15 to get ALL the necessary monsters in one spot. And not including Sabina is a real head-scratcher. But overall it's a very good set and basically indispensable if you're running the campaign. The first side provides what I think is the most useful of the various tavern maps, although I would call this an inn since it also has rooms for sleeping. It's generic enough that you could use it pretty much anywhere. It has a good sized main room with plenty of tables and chairs that provide some interesting tactical obstacles without excessively gumming things up. The backrooms provide additional chokepoints or areas where defenders can retreat. The second level of the tavern is conveniently located on the same side, so your battle can be raging on both levels simultaneously. Even with both levels on one side, there's plenty of room for combat. Now, the not-so-impressive aspect is the second side. Providing a completely generic, open, grassy battle map is, to my mind, a complete cop out. It has absolutely nothing to do with the inn and shows a real lack of imagination. How about providing additional levels to the inn, such as an attic or cellar? Perhaps stables for travelers? No, just a grassy field. As much as I like the first side, I can only give this 4 stars due to the complete cop out on the second side. Still, given how good the tavern is, I imagine it will get a lot of use. The best battle maps are those that both makes sense, from a "realism" perspective, and yet manage to provide an interesting environment for combat with varied tactical options. The first side, showing an expansive library made up of open rooms, a multitude of stairs, raised platforms, and study areas, hits all of the above. I have a key combat coming up against an evil group of adventurers and can't wait to use it. The second side I'm a little more unsure about. Although it too has an interesting layout, it is subdivided by a web of blue, cloudy energy. The description says they're for warding of experiments, etc., although you could just as easily turn them into some sort of magical trap. The usage seems rather particular, but is nonetheless interesting. Based on the first side alone this is worth every penny, and the second side is gravy that you may or may not find reason to use. My group finally finished this after 4 sessions - that's a lot of gaming! Overall, this is absolutely a 5-star adventure, improving on what was already an impressive start in Part 1, The Feasthall of Ash. You’re better off starting with the first module, but you can easily jump straight into this one (although this module is like The Empire Strikes Back, the adventure clearly doesn’t end with this module, so you really can’t call it a stand-alone adventure). This review does include spoilers. The atmosphere has a creepy, haunted, Eastern European vibe, which works extremely well. The fog, the plague-stricken villagers all with chicken claw amulets around their necks, the welcoming and grandmotherly but slightly creepy innkeeper, the little ghost girl and her references to witches, the abandoned temple, the creepy marionettes attacking from darkness – it all worked extremely well. My players were on edge from the start. They have already deduced that all the weird stuff going on stems from a feud between two bitter women – one who lost her husband to a younger, prettier interloper, and one who in turn lost her husband, her child, and eventually her own humanity to the jealousy and vengeance of her husband’s “ex”. It’s very personal, and all the more impactful. The amount of detail and background are a godsend, and to do the adventure justice you will need to commit to some preparation time, it’s not something that all fits together after a quick readthrough or on the fly. There’s plenty of info on key NPCs and other background info, which my players unfortunately missed out on as they went directly to the temple and broke in, which turned the villagers against them. But the adventure is also fairly “sand-boxy”, if you will, as things can unfold logically no matter which direction the players take once they reach the village, and the adventure also provides some guidance on how to do so. For all the time and attention to detail in the development of the plot, there are a few omissions/inconsistencies that bother me: - Page 26 states the temple’s guardian statues will animate and attack the party if they try to breach the main entrance, although no combat stats are provided other than hardness and HP. Later on, the same page seems to imply that anyone breaching the main entrance is cursed by the statues, not attacked. - Vasily’s note that the party finds in the temple (p. 30) states that the planar bleed now works autonomously, allowing him to retreat to Petrov Manor and have his servants bring him the Antecedent of Easement. If that’s the case, why isn’t it working when the party encounters it (other than the fact that this would make for a very short adventure)? Also, Elena’s spirit, when she relives her death, begs Yaga not to kill her as she has already handed over “Papa’s magic potion” (p. 50). If the planar bleed is working autonomously, Yaga simply could have gotten the elixir from the temple. - The Antecdent of Easement is apparently inside the Flesh Within that has occupied Yaga’s body (p. 62)? Um, why? This is the “Holy Grail” of the adventure and there’s only one small reference to this in the conclusion, with no explanation of why or how. Did she drink it? Before or after the Flesh Within took over her body? How many years ago- presumably decades? And it's still within her body? And why is the Flesh Within even inside her? I assume she did so willingly when learning how to tap the power of the Plague Demon, but in an adventure fully brimming with information, this sort of thing shouldn’t go unanswered. I’m being pretty picky here, because there’s not much else to complain about. It’s a great plot in a great setting. I’ll adjust this review as we get further into the adventure, but it has met and exceeded all expectations. ***** FEBRUARY 2018 UPDATE ***** After four lengthy gaming sessions, my players finally brought the adventure to a close. I love how the pieces of this adventure have slowly fallen into place, with a full understanding not coming until the final session. Layer by layer, each part of this drama has slowly revealed itself. Through their prior exploration of the village and Petrov Manor, and the confrontation with Yaga’s cultists in the gardens outside, they now understand the role that each of the tortured souls in this petty but deadly drama has played. After freeing Elena’s spirit and discovering the slumbering plague demon entombed beneath the garden’s of Petrov Manor, the Party finally confronted Yaga in her hut. Wary of her power, they spent a considerable amount of time going back and forth, bargaining over the Antecedent of Easement. After failing to reach a bargain they eventually attacked. Due to the size of the Party I buffed her power, and gave her a couple of ensorcelled guards. It was a pretty intense battle and a fitting conclusion. Despite a few minor oversights, this is clearly a five-star adventure and highly recommended. Can't wait to get them started on the next adventure in the series! ***** PRELIMINARY REVIEW*****
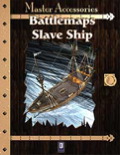
There’s a lot to like about this module, and I’m chomping at the bit to get started. The amount of information is a little overwhelming but very well organized and presented. NPC info is truly excellent, such as the copious background info presented on the residents of Westden Falls. It will take a couple of read throughs to really absorb everything, but I can see my players wandering through the town, having very organic conversations with NPCs, with myself working in the text blocks on key discussion points as needed. There are some NPC details that are almost red herrings, e.g., did the mayor and the constable eliminate the prior mayor, will the Party investigate why he doesn’t seem to have aged in years? It’s truly irrelevant to the adventure, but could well distract “completionist” players who feel like every piece of info must be relevant, and given the deadline of the summer solstice, those side quests could come back to haunt them. I also love how the plot is designed to slowly unfold. My group has been told that they’ve been asked to investigate the disappearance of the missing dwarven diplomat (one of the provided adventure hooks). They’ll learn about the harpy attacks and head off towards the church and Bertram’s End, probably assuming that the missing dwarf might be one of their victims. I imagine it won’t be until 2 or 3 sessions into the adventure that they’ll learn the true threat. So, as I’ve been preparing for our first session, the biggest downside I've noticed is the inadequacy of the maps. The one page maps of Westden Falls and Bertram’s End are very good, and I made player maps by scanning them and cropping out the DM-oriented info. A bit annoying but perfectly workable. Much more concerning are the tiny and broken up battle maps for the church/crypt and the mine. The church map is no bigger than one half of a column on one page, maybe 2” by 4” at most. The map of the catacombs is even smaller. The mine at Bertram’s End doesn’t even get a unified map. It’s broken up into individual segments separated by encounter info, so you have no overall sense of what the mine looks like. In a module of such excellent quality, it’s a glaring oversight. Finally, I can’t help but mention that there are a couple of references to sexual violence being committed by the gnolls against the captives in Bertram’s End. I’m sure others will disagree, but it was jarring and unnecessary. Overall, the module is strongly recommended, and I can’t wait to get started. It’s well written, highly detailed, and with a gripping story. At the moment I’m giving it 4 stars due to a couple of weaknesses, but I’ll reevaluate based on how much my group enjoys it. ***** NOVEMBER 2017 UPDATE ***** I just ran an 11-hour kickoff session with my group of six 5th level characters, who had a blast. They made it through Westden and the Old Church. On the trail of the missing dwarven diplomat, they made the rounds in Westden and met with many of the key NPCs, who were easy to flesh out due to the excellent background info. They took an instant disliking to Alden but loved Magda Stonejaw. Since I have six players, I decided to up the ante by running the ankheg encounter with the crossing of the Nelec bridge, with a wandering bulette attacking them from behind, as I hoped to drive them across the icy bridge with the monsters in pursuit. While they took substantial damage, they prevailed against the monsters. I also had them face both the dire wolves and the harpies simultaneously at the Old Church, and I upped the skeletons in the crypt to make it a more interesting horde-type combat. Overall, they had a great time and are looking forward to the next session. Unfortunately, the map problem is more serious than I suspected. The map for Westden Falls is excellent, and while there are no maps for any of the buildings, no serious encounters are anticipated so it’s not really a problem. The map for the Old Church is terrible. It has no numbering, so even though the text refers to “area 6” or “area 7” for example, those areas aren’t designated on the map. It is so small and detailed it is difficult to replicate by hand on an erasable board, so I copied it into in to Paint and printed it as a 4-page map that I taped together. Due to the small size and resolution of the original, my battlemap was fairly blurry. The map for the crypt is the same, and I suspect is a reprint, as the crypt is supposed to be underground, but the “crypt” map seems to have bushes and other exterior features. ***** JANUARY 2018 UPDATE ***** In our second session, the party discovered the slain flight of elves, battled Gurzan the lycanthropic ogre, learned of the missing seed to the Tree of Life, and then journeyed to Bertram’s End to discover it occupied by gnolls. After scouting the perimeter of the town, they assassinated the two sleeping ogres and liberated the women prisoners from the stables in dramatic fashion, swiftly defeating the gnoll guards and wolves. Would have been nice to have a map of the stables, since it nearly turned into the site of a major battle. Although they had planned to draw some of the gnoll army into the barn and set it on fire, when they realized just how many gnolls were mobilizing they fled into the woods with the rescued prisoners, but not before catching a glimpse of an irate Ironmaw. The women described just how ghastly the gnoll occupation is and revealed the separate groups of men, children, and wounded prisoners. Heading next into the mines to find a safe location for the liberated prisoners, the map problems again became evident. The mine levels are small and not particularly interesting, other than a couple of clever obstacles and traps to overcome that provide a nice break from the combat in the town. Again, there are a couple of areas referenced in the map description that are not indicated on the map itself. Overall, I think the mines could have been done much better. They were glad to meet Bertram/Pyrite, and by discussing the missing dwarven diplomat and not looting his supplies and treasure, they gained his cooperation and a shelter for the liberated women prisoners. But, the mines really don't figure into the plot, other than providing a diversion, and there's no real role for Bertram/Pyrite, despite the excellent background info. After leveling up, they plan to liberate the men and weapons from the forge, and perhaps create a small force to lead against the gnolls. Not sure they realize just how difficult this might be! ***** JANUARY 2018 UPDATE #2 ***** So, demonstrating the sand-box style to the adventure, our third session (also about 10 hours) led to a partial victory for the Party. After leveling up, they led another raid on Bertram’s End and managed to free the male prisoners held in the forge (in which I included the missing dwarven diplomat that sparked the adventure), fending off 2 patrols of gnolls and an ogre, with the help of the sorcerer’s newly acquired Fireball spells. They were not, however, able to liberate or destroy the gnolls’ armory. Their next step involved some much delayed reconnaissance, as the Party’s druid used Wildshape to further explore the town as a rat, as well as the looming storm to the north as an eagle, which revealed the presence of Jirak Thoole’s titular Bleeding Hollow. Some in the Party wanted to rescue the children being held in the townhall, while others lobbied for a decapitation attack against the gnolls’ leaders in the inn. Eventually, after learning of the children being sent to Jirak Thoole as sacrifices, they decided to strike against the corrupted druid himself. The provided battle map is fairly good, although I used Pathfinder’s Bigger Forest Flip Mat. An epic battle unfolded in which the Party took heavy damage and nearly lost several PCs, but they eventually prevailed and were able to take down Jirak before he could Wildshape into an air elemental and escape. While savoring their victory against Jirak, the Party will next turn their attention to liberating Bertram’s End, or at least rescuing the children. They also plan to seek out the elves and help purify the Arsae Laidir, and possibly return to Westden to investigate the suspicious Mayor. We’re now 30 hours into the adventure and still have plenty to do. This is still an excellent adventure, but the lack of quality maps keeps it from being five stars and generates a lot of additional hassles for the GM. Still, we’re having a great time and I highly recommend this adventure. I ran this as the second adventure for a party of six 2nd level characters, all of them fairly new players. While I have some criticisms, overall we had a good time and will be continuing the adventure with the next module. The Feast Hall of Ash has a lot going for it – an interesting setting, a good story, and (most of the time) interesting foes. Some of these strong points could have been even stronger. For example, I felt that going into the Fae should have been a more fantastical experience, and the first encounter with Eoghan is kind of simplistic. Things do pick up once you reach Lord Ash’s hall, which is the highlight of the adventure. Unfortunately, this then leads to the biggest disappointment – the Fomorie, who both open and close the adventure. These legendary enemies of the Tuatha are just kind of boring. Instead of a desperate battle to defend the village, the finale against the Fomorian invasion is a huge let down with an extremely simplistic battle map – just a store house and three almost identical groups of Fomoire attacking every few rounds. Despite these weaknesses, we greatly enjoyed the adventure and I would still recommend it. With a few tweaks, it can be an excellent adventure. Printed out the full color map to use with Slave Ships of Absalom for a less claustrophobic combat environment. Looks great and well laid out. Once all the map pages for the top deck are taped together the battle map measures roughly 43" x 8.5", so you'll need a fairly big table, or you can divide it in half and just have each section side by side. The lower deck measures roughly 26" x 8.5". The Village of Swallowfeld is a terrific source book and an excellent starting point for a new party. It has 37 pages of information, just about everything you could hope for, on a simple village! Set on the outskirts of civilization that typify the start for many adventuring parties, it has a gritty, lived-in feel to it that adds authenticity to the setting. In addition to excellent background information on the general locale, geography, economy, and culture, the key NPCs are extremely well developed and include portraits that help bring them to life. Perhaps the only deficiency I can find is in the maps. The key map of Swallowfeld seems rather sparse. Also, there are no maps for the buildings themselves. Yes, I can whip up a map of the garrison, the inn, or the temple off the top of my head, but the primary purpose of the source book is to save GMs time, and this seems like an oversight. Overall, however, the source book is a terrific value and extremely useful. Don’t hesitate to pick it up.
|
Sign in to create or edit a product review.
|